MiSTer for JVS CRT cabinets

Introduction

This page is about getting MiSTer running in your 31KHz/Tri-Sync JVS cabinet as quickly as possible.  

Hardware

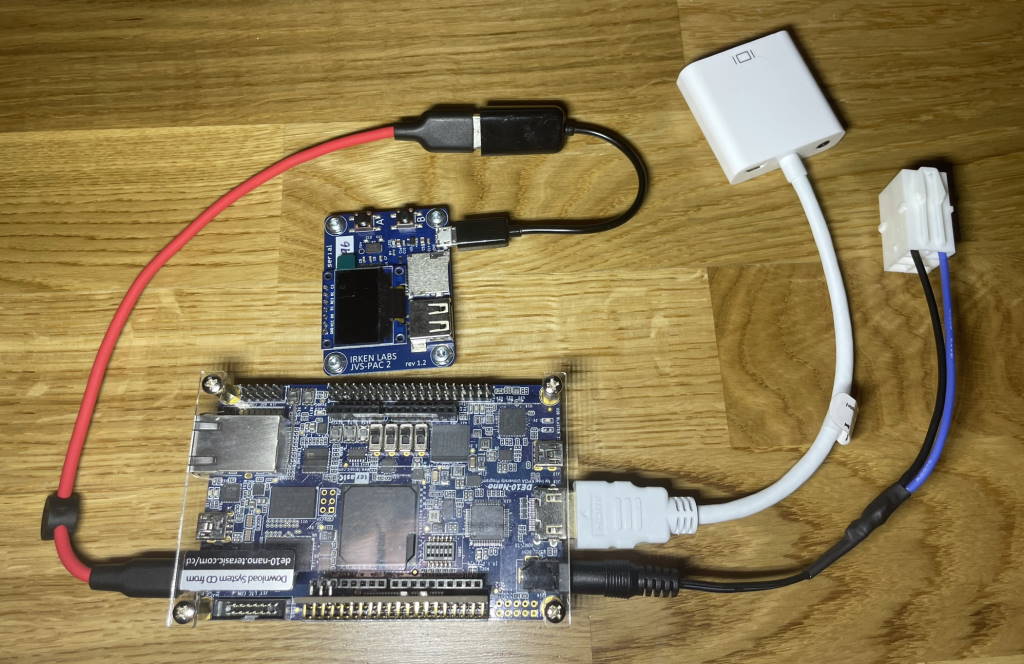
  • DE10-Nano kit
  • SDRAM module
  • micro SD card, I use a 16GB card that has 14GB unused
  • HDMI to VGA dongle, with analog audio out.
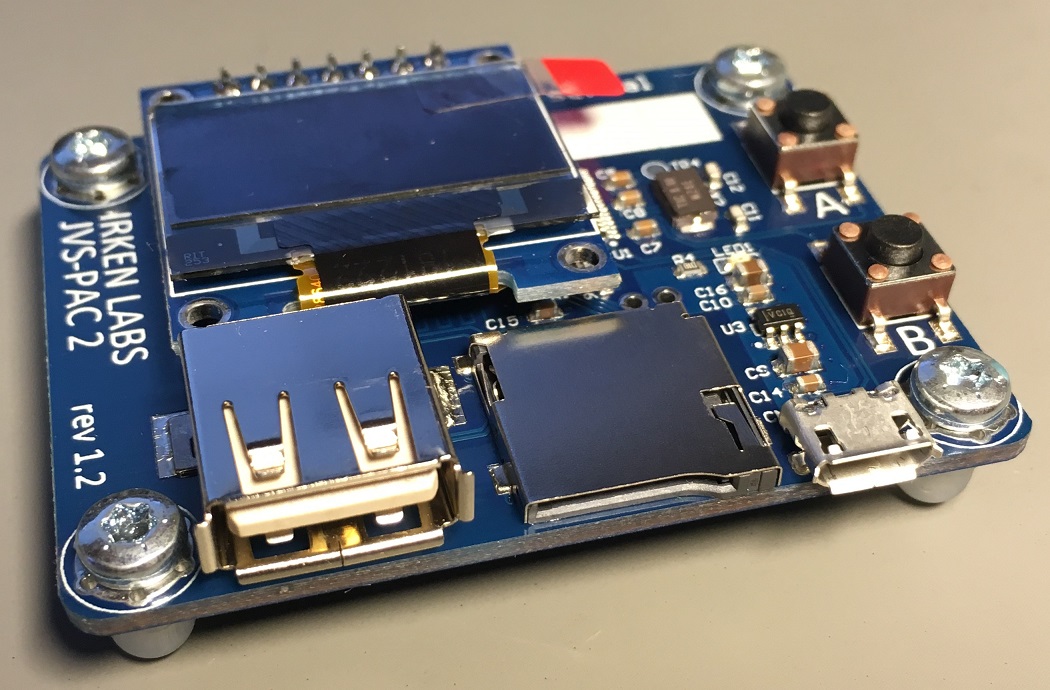
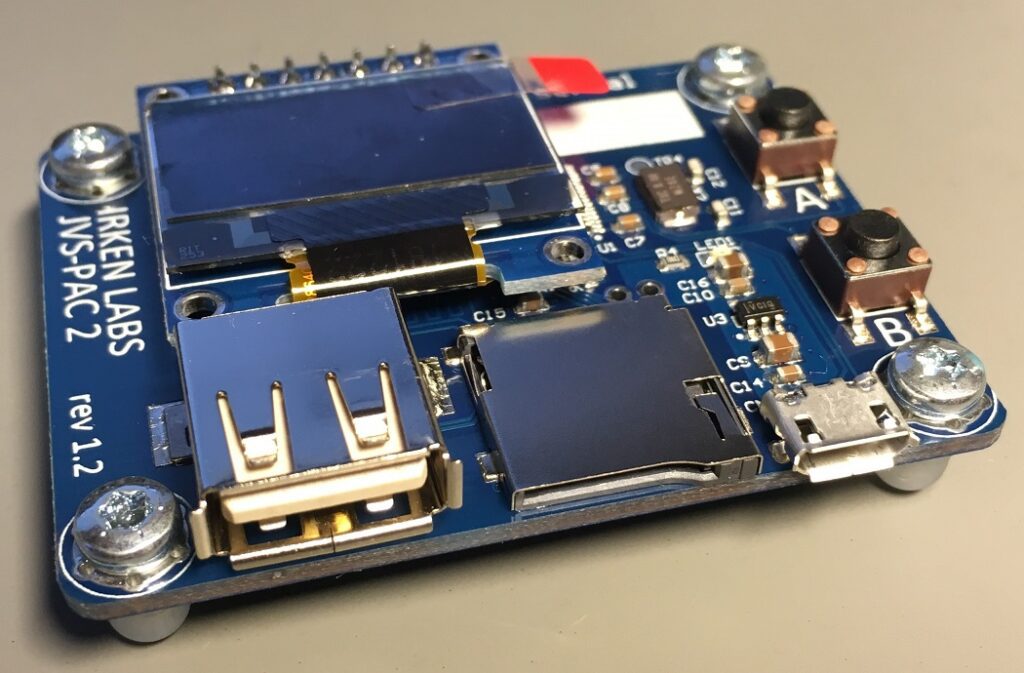
  • JVS-PAC 2 🙂
  • USB OTG adapter
  • 3.5mm to RCA adapter for Audio

In other words, the only MiSTer specific hardware you need is the SDRAM module.

Part 1 – Installing MiSTer

Step 1 – Preparing the SD card

First you need to install “Mr. Fusion – Universal MiSTer installation image” on an SD card, https://github.com/MiSTer-devel/mr-fusion.  You do this from a normal computer.
 

Step 2 – Power up and update MiSTer 

For the initial setup, it’s probably best to do it on a desk with a keyboard, an ethernet cable and a normal HDMI monitor.

Boot up MiSTer, press F12, navigate to “Scripts”, and choose “update”, let it do it’s thing.

Step 3 – Making MiSTer useful

How MiSTer organizes cores, roms, launching files etc is a bit of a moving target and can be confusing and frustrating to set up from scratch.   Luckily, there is a script that does everything for you:

https://github.com/theypsilon/Update_All_MiSTer

Run this script, and it should take care of making your MiSTer useful.

Part 2 – Getting your MiSTer cab ready

Step 1 – Configure video

Before running the DE10-Nano in your cab, you will need to do a couple of changes.  Boot up MiSTer, press F12, navigate to “ini settings” and make the following changes:

video_mode=640×480 60Hz 

vsync_adjust=low_lag

vscale_mode=Use integer scale only

direct_video=on

video_info=10 seconds

For 31kHz only cabinets, also set

forced_scandoubler=on

The video mode setting above is just for the menu when booting, games will run at native resolutions, or line-doubled for 31kHz only cabinets.

Step 2 – Hardware installation

This is pretty straight forward, plop the RAM module in place if you haven’t already and just connect everything together.  

Power

DE10 power should be sourced from the same source as your cabinets DC power supply, or better yet – use your cabinets DC supply directly.  

The HDMI to VGA dongle should work without any external supply, the one I got works just fine without connecting an external power supply.

Audio & Video

Both Audio & Video will go through the HDMI dongle, use the 3.5mm to RCA adapter for audio.

Controls

Use a USB OTG adapter between the DE10-Nano and the  JVS-PAC 2.  The JVS-PAC 2 has a specific shift mode for mister that lets you switches cores and change settings without using a separate keyboard.



Part 3 – Details for the technically inclined

MiSTer input system (stuff doesn’t work..!)

The input system of MiSTer is a bit of a mess when it comes to arcade cores.  MiSTer cores can consume gamepad and/or keyboard input from the Linux subsystem, which makes sense from a console/retro-computer perspective, but no so much for arcade, where you have one cabinet.  It’s not obvious where an arcade core should look for things like TEST, SERVICE, TILT etc, so naturally, it’s either not implemented or varies from core to core.

Gamepad input

For a console/computer core, one physical USB device will be player 1, another physical device can be player 2.  This is all strongly tied to low-level USB workings, so input from one USB device is constrained to one player. 

Since gamepads are not equal, you will also have to remap your gamepad.  To complicate matters further, MiSTer can take input from a physical USB keyboard and present it to a core as ONE gamepad, not two..  There is a hack to get around this, but I will not get into that.

Keyboard

To avoid the complexities of the MiSTer input system, arcade cores can also consume keyboard input where there is no artificial player1/player2/cabinet limitations.  Most cores support this, and most cores use the standard MAME mapping.

Getting out of trouble / limitations

If you for whatever reason used the “Define joystick buttons” of MiSTer and and pressed something on your cab – you now have a virtual gamepad, which will cause issues with things that consume keyboard input, like arcade cores. 

To fix this, have a look in the “config/input” directory on the MiSTer SD card, and delete the .map files you have there.  

Unfortunately a keyboard device like the JVS-PAC 2 can’t be both a “virtual gamepad” and a keyboard, unless you are super careful how you set up the mapping in MiSTer, so the JVS-PAC 2 is probably not a great option if you want to run retro-computers/consoles AND arcade cores in your cabinet – something you shouldn’t try in the first place, as it’s frowned upon by purists 🙂

In the absence of an arcade specific input system in MiSTer, I suspect MAME keyboard input will be the standard going forward.

If the particular core you want doesn’t support keyboard input or it uses strange keys, support the developer via Patreon and tell them you want standard MAME keyboard input.  

Video output

In the early days of MiSTer, there was a need for analog RGB output.  This was solved by making an open source “IO board” that connects to the 40 pin GPIO1 header on the DE10-nano, using 20 pins for video – 18 bits for RGB and 2 for sync.  There are a couple of issues with this and the current implementation

  • No video DAC, analog RGB is generated simply by using resistors on the GPIO signals, without an op-amp to ensure correct output impedance.
  • No buffer on sync lines, it will be 3.3V instead of 5V – this is usually not an issue
  • Although the datasheet for the DE10-nano states the GPIO 1 pins are protected, there is nothing in the schematic that reflects this
  • As the number of available GPIO pins on the header is limited, you “only” get 18 bit RGB, i.e. 262k colors vs 16.7m with the HDMI dongle.

The first three points can be solved with better hardware on the IO board, but it’s not really needed as you have the direct_video option via HDMI.

HDMI and direct_video to RGB

The FPGA on the DE10-Nano has 24 pins routed to an ADV7513 HDMI transmitter.  This is just a transmitter, it’s the FPGA’s job, i.e. the core, to make sure that what’s transmitted is HDMI compliant when it comes to resolutions and refresh rates.  This fact is utilized with direct_video, where it violates HDMI resolutions and refresh rates and simply transmits core native video.  Your HDMI flat panel monitor will not like this, but the HDMI-to-VGA dongle doesn’t care and will output a 24 bit RGB signal.

Apart from more colors and a proper video signal, the benefits of the dongle is they’re very cheap and do not risk damaging the FPGA due to mishaps when hooking up a monitor.

Audio output

The DE10-nano does not have a dedicated audio output, apart from digital audio via HDMI.  The open source “IO board”  provides analog audio utilizing an incredibly simple circuit consisting of 6 capacitors and 4 resistors, which is not known for stellar audio quality. The IO board also has the option of outputting TOSlink, that you can feed to an external audio DAC if you get a special 3.5mm cable or adapter.

Analog audio from HDMI

Utilizing a HDMI to VGA dongle as described above, it will extract the digital audio from the HDMI stream and convert it to analog using a DAC.


MAME for 31kHz Cabinets

Introduction

This little write-up aims to take the magic out of this fantastic setup, make it accessible for everyone, and get you up to speed in a couple of hours instead of a couple of days.

The goal of this MAME setup is:

  • Ease of setup and use, something that works as much of out the box as possible
  • “Perfect” Image quality 
  • Optimal for 31 kHz monitors, like the monitor in my Naomi Universal cabinet 🙂

Hardware

I bought a refurbished Dell Optiplex 9010 SFF, Quad Core i5-3570 3.4GHz / Radeon 6450 1GB / 8GB RAM.  It’s almost ideal, except that it’s too wide to fit through the base door of the cab.  I chose this model for a couple of reasons:

  • Has ‘built-in’ Windows 7 license, most name-brand PC’s do.
  • Plenty fast enough
  • Has a crt-emudriver compatible video card
  • Quiet

To make it a little snapper to boot and work with, I installed a Crucial BX500 240GB 2,5″ SSD.

A JVS-PAC 2 goes without saying 🙂

Part 1 – Windows, GroovyMAME & CRT Emudriver

Step 1 – Install Windows

I found a torrent that had updated versions of Windows 7 ISO images, made a USB key and picked Win 7 Professional OEM x86.  Update late 2023: Activation of windows 7 was only possible using the phone service. I also had to manually download two windows update patches to get the network driver package from Dell installed and to get Windows update running.

A few post-install steps:

  • Press left shift until a popup about sticky keys appear – disable everything.
  • Make sure device manager has drivers for the hardware you’re running (except video card)
  • Control Panel\Hardware and Sound\Power Options\Edit Plan Settings – disable sleep and turning off display
  • Install chrome
  • Run windows update until it’s happy

Step 2 – Download GroovyMAME 0.220 & CRT Emudriver 2.0

GroovyMame and Emudriver runs in tandem.

Head over to GroovyMAME http://forum.arcadecontrols.com/index.php?board=52.0, GroovyMAME sticky topic. 

The post is a little confusing and too long, follow the links to the Eiusdemmodi forun and grab the appropriate CRT Emudriver 2.0 package for your video card.

For GroovyMAME there is a google drive link in the same topic, you will need 7Zip to extract it.

Step 3 – Install CRT Emudriver

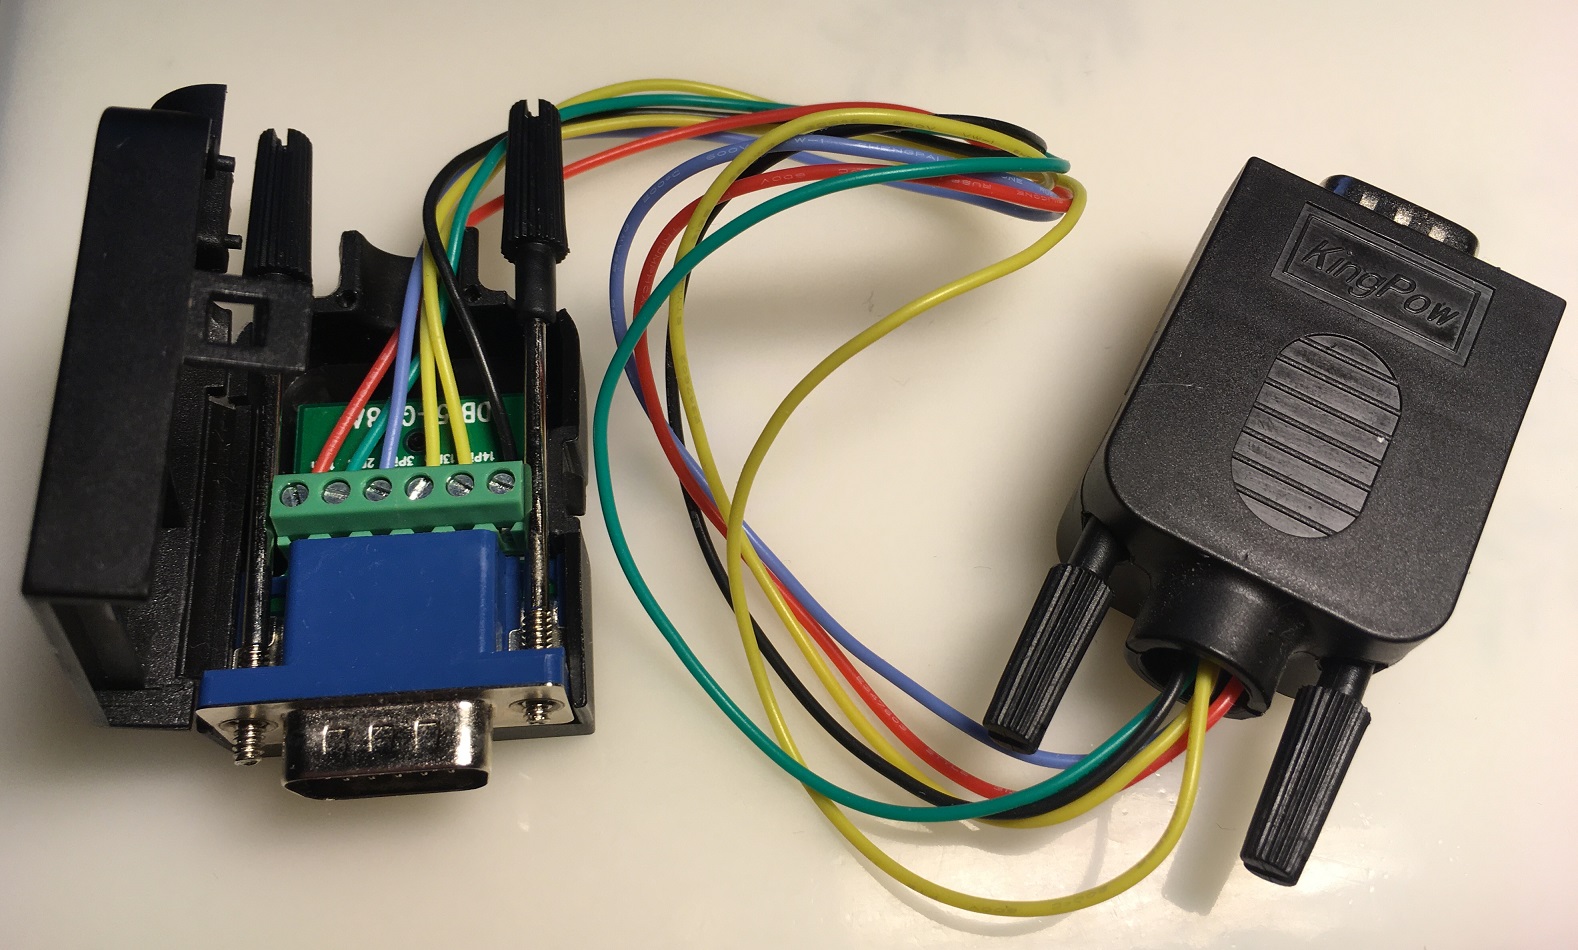
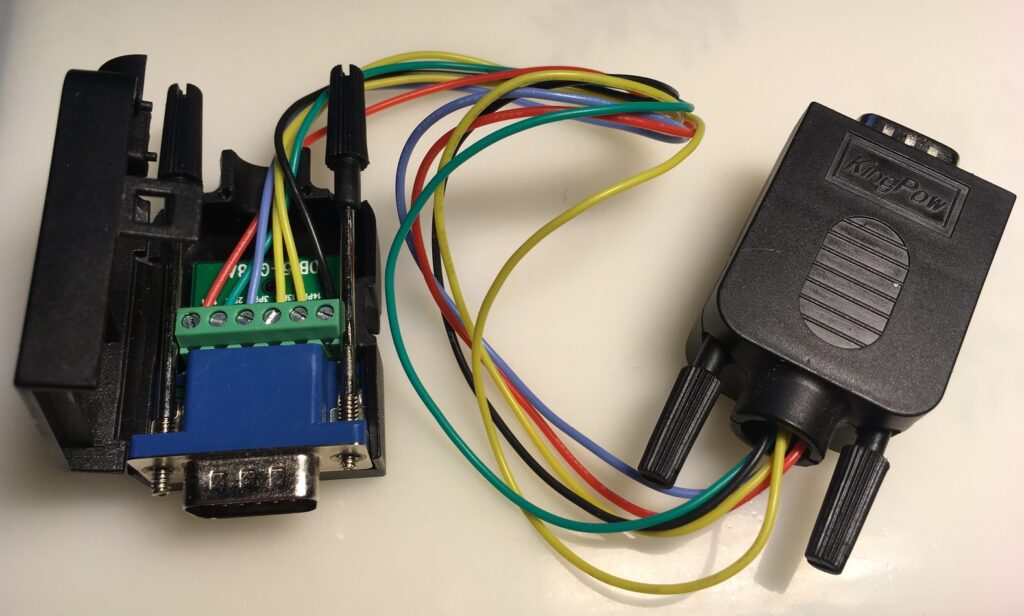
At this point, do yourself a big favor and use a cable that only has RGB, sync and ground.  This will ensure that whatever you’re doing on your desk will be the same when you move machine to a cabinet.  If you do this, you can also ignore everything that’s written about EDID emulation, monitor detection and whatnot.  You can easily make one yourself with a couple of VGA breakout from eBay:

 The Emudriver needs to tweak windows a bit, so first time you install it will ask you to enable “TESTSIGNING”, say yes, reboot, run install again.  Your desktop should now say “Test Mode” in lower right corner.

Step 4 – install groovyMAME

Extract GroovyMame to c:\mame, create folder c:\roms and change rompath entry in mame.ini to:

rompath roms;c:\roms

Drop a few roms in the roms directory.  At this point, MAME will not run properly.

Step 5 – Make groovyMame and EmuDriver do it’s thing

Run vmmaker that came with the driver.

“Edit settings”, set monitor type to “Arcade 31.5kHz – high resolution”.  Click edit monitor presets, and change this entry (modified parameters highlighted) to:

monitor “arcade_31”, “Arcade 31.5 kHz – high resolution”, “4:3” crt_range0 31400-31500, 49.50-65.00, 0.940, 3.770, 1.890, 0.349, 0.064, 1.017, 0, 0, 384, 512, 0, 0

The changes accomplishes:

  • Vertical resolutions >480 for games that have more than 240 lines
  • Disable interlaced modes that will mess with MAME

Click the “MAME” tab, navigate to the mame64.exe you extracted in step 4.

Check Export Monitor settings to GroovyMame

Check “Get Video Modes from MAME.XML”.

Check “Generate XML from MAME executable”.

Verify that “Mode table method” is set to “Dynamic”.

OK it, back to main menu, click “Generate Modes” – this will query MAME and generate all needed video modes.

Finally, click “Install modes”

Step 6 – Verify mame

At this point, you should have a working system that will look fantastic.

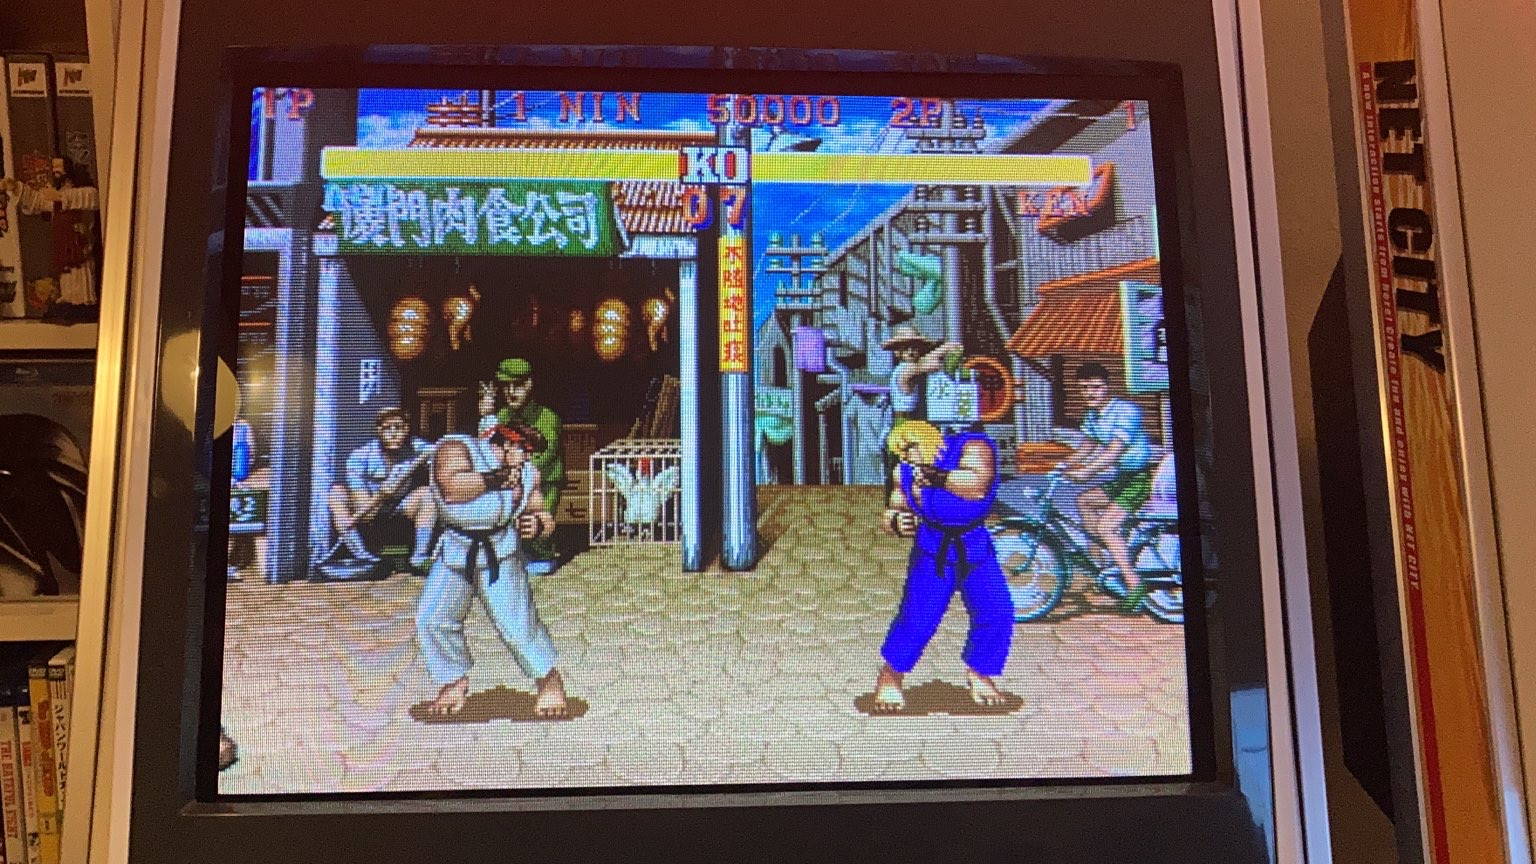
Mortal Kombat 3 is a good game to test with as it has odd resolution and refresh rate.  When launching mk3, the info screen should say that switchres use “400 x 512p 54.707 Hz 31.402kHz”

Street Fighter 2 is another good game to test with, the info screen should say that switchres use “768 x 480 59.637 Hz 31.429 kHz”.  Verify that the intro sequence does not tear.

If you want scanlines (you do), change the effects line in mame.ini to:

effect scanlines.png

I find the scanlines do not look quite right, so for crisper scanlines I use this , just right-clock and save it in your C:\mame\artwork folder.

Part 2 – Attract Mode frontend

http://attractmode.org/download.html

Extract to c:\attract

Launch attract, it should ask if detected emulators should be imported – say yes.  It will now launch, and display the test roms you have in your c:\roms folder, but will not launch them properly.

[TAB] to configure , navigate to “Emulators” -> “mame”, change “Working Directory” to “c:\mame”, ESC back to game list, you should be able to launch the games.

Add more roms

After dropping some more roms into the c:\roms directory, 

[TAB] to configure, navigate to “Emulators” -> “mame”, scroll down to “Generate Collection/Rom List”, “Overwrite existing ‘mame’ list?” -> yes, 

Disable intro video

[TAB] to configure screen, “Intro”, change “Play Intro” to No.

Part 3 – Prepare PC for cabinet

This would be a good time to connect the JVS-PAC 2, you will see that windows installs drivers the first time you connect it.  Don’t worry about JVS at this point.

We want windows to run in 640×480 60Hz, and we want Attract Mode to launch automatically on boot.

Run windows in 640×480 60Hz

Right click on desktop, Screen Resolution, “Advanced settings”, “List All Modes”, pick “640 by 480, True Color (32 bit), 60 Hertz”, “OK”, “OK”.

Since you earlier decided to make your life easy with a special VGA cable, this will “stick” when you move the computer to a cabinet.

Launch Attract Mode at startup

Create a batch file c:\attract\start-attract.bat (you can use notepad):

timeout 7
c:\attract\attract.exe

I experienced windows stealing focus from Attract Mode, resulting in keyboard input not working – the timeout 7 takes care of that.

Make it launch at startup:

Windows start -> All Programs -> Right click “Startup” -> “Explore”

Right click, “New” -> “Shortcut”, navigate to the batch file you just created., 

reboot machine to verify.

FAQ/Issues

Known issues / FAQ

SD-Card insertion while unit is powered on

Depending on the PC connected to the JVS-PAC 2, you may experience that the unit freezes if you insert an SD-card while powered.  Fix is to simply insert the SD-card before connecting unit to PC.

Saving configuration doesn’t work

There is a known bug affacting writing to cards formatted with exFat.  Workaround is to reformat card, fat32 etc is ok.

FAQ

Do I need more than one JVS-PAC 2 for a cabinet with 2 players?

No you do not, the JVS-PAC 2 talks with the IO board and reads both players.  With cabinet linking or the Capcom IO, you get up to 4 players from the same JVS-PAC 2.

Does it support cabinet analog controls?

At the moment no, i.e. it won’t be of much use in racing cabs and the like.  It is however planned in a future firmware update.

Can this be used with XBOX 360?

No it can’t.  Microsoft has locked down their peripherals with hard crypto to ensure license revenues from 3rd parties.

Can this be used with the PS3?

At the moment, no.

Can this be used with the PS4?

Unfortunately no.

Is xinput supported?

Unfortunately not.  ‘xinput’ is a non-documented variation of standard USB HID.  The changes made and lack of documentation can only be attributed to Microsoft wanting to secure 3d party license revenues.  Making the JVS-PAC 2 do xinput would mean heavy modification of the core USB code, and would likely be limited on a single controller, in short a big hack that’s not very attractive to implement.

Keyboard Operation

Introduction

 Out of the box, the JVS-PAC 2 behaves like a keyboard, suitable for use with MAME without any user configuration.  In other words, if you have a working mame – you can simply connect the JVS-PAC 2 and things should work.

Controlling MAME – shift mode

In MAME, to quit games, control volume, pause a game etc – you would normally use a keyboard.  The JVS-PAC 2 makes this easy by having the 1PSTART button work a little different.  There are 3 modes to choose from, depending on how many options you would like.  You can choose which of the 3 modes you would like in the OLED menu on the JVS-PAC 2.  

No shift mode

If you don’t want or like the shift key functionality, you can choose for it to be “OFF”. Be aware that the MAME license does NOT permit operation in a commercial setting.

Limited shift mode, ESC only

The limited shift mode will only enable you to exit games from MAME.  By holding 1P start pressed for a couple of seconds, it will issue and ESC on release.  A normal tap on 1Pstart will issue the normal key configured for 1Pstart on release.

Full shift mode

Activate by pressing and holding 1P start, then one of the inputs below:

InputKeyboard
Player 1 leftEnter
Player 1 rightTab – enter MAME menu
Player 1 up~ – volume adjustmests++ in MAME
Player 1 downp – pause MAME
Player 1 button 15 – increase credit
Player 1 button 2INS – speed up MAME
Player 1 button 3F2 – MAME test key

MiSTer shift mode

Activate by pressing and holding 1P start, then one of the inputs below:

InputKeyboard
Player 1 leftEnter
Player 1 rightF12 – MiSTer menu

Default Keyboard Mapping

This section details the resulting keys out of the JVS-PAC 2 based on cabinet input.  The mapping is tailored for use with MAME.

Cabinet related

Cabinet InputKeyboard
credit increase slot 15
credit increase slot 26
player 1 service button9
player 2 service button0
test buttonF2

Player input

 Player 1Player 2Player 3Player 4
Start1*234
Leftleft keydiKeypad 4
Rightright keygkKeypad 6
Upup keyrjKeypad 8
Downdown keyflKeypad 2
Button 1left CTRLaright CTRLKeypad 0
Button 2left ALTsright SHIFTKeypad comma
Button 3space keyqEnterKeypad enter
Button 4left SHIFTw  
Button 5ze  
Button 6xk  
Button 7cj  
Button 8vl  

*) If a shift mode is enabled, “1” will be issued upon release
**) Player 3&4 requires either a Capcom IO in 4 player mode, or a linked setup.

Changing keyboard layout

If you have special needs, or want to wire up an extra button for non-game use, you can change the keyboard mapping by editing the .ini file generated when saving the configuration.

The following keys are available:

KEY_NONEKEY_MKEY_3KEY_RIGHTBRACEKEY_F7KEY_LEFTKEY_KP8 KEY_KPCOMMA 
 KEY_NKEY_4KEY_BACKSLASHKEY_F8KEY_DOWNKEY_KP9KEY_LEFTCTRL
 KEY_OKEY_5KEY_HASHTILDEKEY_F9KEY_UPKEY_KP0KEY_LEFTSHIFT
 KEY_PKEY_6KEY_SEMICOLONKEY_F10KEY_NUMLOCKKEY_KPDOTKEY_LEFTALT
KEY_AKEY_QKEY_7KEY_APOSTROPHEKEY_F11KEY_KPSLASH KEY_LEFTMETA 
KEY_BKEY_RKEY_8KEY_GRAVEKEY_F12KEY_KPASTERISKKEY_COMPOSEKEY_RIGHTCTRL
KEY_CKEY_SKEY_9KEY_COMMAKEY_SYSRQKEY_KPMINUSKEY_POWERKEY_RIGHTSHIFT
KEY_DKEY_TKEY_0KEY_DOTKEY_SCROLLLOCKKEY_KPPLUSKEY_KPEQUALKEY_RIGHTALT
KEY_EKEY_UKEY_ENTERKEY_SLASHKEY_PAUSEKEY_KPENTERKEY_F13KEY_RIGHTMETA
KEY_FKEY_VKEY_ESCKEY_CAPSLOCKKEY_INSERTKEY_KP1KEY_F14 
KEY_GKEY_WKEY_BACKSPACEKEY_F1KEY_HOMEKEY_KP2 KEY_F15 
KEY_HKEY_XKEY_TABKEY_F2KEY_PAGEUPKEY_KP3KEY_F16 
KEY_IKEY_YKEY_SPACEKEY_F3KEY_DELETEKEY_KP4 KEY_F17 
KEY_JKEY_ZKEY_MINUSKEY_F4KEY_ENDKEY_KP5 KEY_F18 
KEY_KKEY_1KEY_EQUALKEY_F5KEY_PAGEDOWNKEY_KP6 KEY_F19 
KEY_LKEY_2KEY_LEFTBRACEKEY_F6KEY_RIGHTKEY_KP7 KEY_F20 

Firmware update

Firmware update

The firmware can be updated using a standard Micro SD card.  The card must be formatted with FAT filesystem.

Download zip file below, and extract files to root of sd card.

Update Procedure

  1. Keep  both A and B buttons pressed while connecting the USB cable – the display will show that firmware update is active.  
  2. Follow instructions on screen

Firmware

2021-02-15 MiSTer compatibility, changed default player 2 button 5 from I to E (MAME standard).

2021-01-13 Fix bug where coin stops working if IO board is rebooted or reconnected while JVS-PAC 2 remains powered

2020-08-02 A screensaver will kick in after 5 minutes to preserve OLED, hold B button for 2 seconds to wake it up.  Internal memory optimization.

2020-06-30 Fix bugs related to 3 and 4 player inputs, added JVS input TILT1

2019-10-24 Correctly Identify IO board in G-Balance cabinets

2019-06-03 Fix bug with IO boards without any player inputs, fix IO board error counter reset, identify Taito RFID board

2019-06-02 Fix keyboard keys ALT,CTRL and SHIFT.  All users should update to this version.

2019-04-22 Initial release

Firmware update problems

Message: Blank screen on startup

Cause: You’re probably touching some of the components on the PCB 

Fix: Disconnect, take care to not touch anything but the buttons and try again.


Message: card bad/missing 

Cause: There is no card inserted, or the card is not accessible on the electrical level by the JVS-PAC 2.

Fix/Solution: Try another card.


Message: card format error 

Cause: The file system is not readable by the JVS-PAC 2. 

Fix/Solution: Verify that the card has a FAT filesystem on it.  The JVS-PAC 2 is not picky about which FAT version (FAT32/exFAT etc), or computer system used to prepare the card. 


Introduction

JVS-PAC 2

Short introduction to JVS

JVS, or Jamma Video Standard (sometimes even called JAMMA 2), is a specification by a JAMMA special sub-committee consisting of the major arcade game manufacturers.  

JVS specifies the type of connectors to use for video (HD-15), audio (RCA) and power (JST VL), in addition to the communications protocol between the game board and the I/O board.  In contrast to (old) JAMMA, JVS concentrates I/O functions in a separate board.  The protocol is well documented, but only in Japanese (thank you google translate & altavista babelfish 🙂 )

Short introduction to JVS-PAC 2

The JVS-PAC2 is a small device  that enables you to play MAME on your JVS cabinet with a minimum of hassle.  It is the successor to the now end-of-life JVS-PAC.  The JVS-PAC2 behaves like a JVS game to the I/O controller, and a USB keyboard to the computer. The keyboard output is mapped to standard M.A.M.E keys.

The main advantages of this setup is:

  • No special (or modification to existing) cabling required – all buttons work out of the box
  • You can swap between MAME and JVS games very quickly
  • Your JVS cabinet stays original
  • It’s easy

Caveat/Disclaimer

The JVS-PAC 2 is tested, but it is impossible to qualify all operating systems, computer architectures, emulators and front-ends it may be used with in advance.  As of 2019-04-21, the JVS-PAC is tested and works without any known issues with:

  • Windows 10 64bit
  • Windows 7 64bit
  • Mame
  • GroovyMame
  • Attract-Mode frontend

New features and enhancements from original JVS-PAC

  • Rapid JVS updates for low lag
  • Enhanced shift-key operation, works with 1-player panels
  • Configurable keyboard mapping
  • Easy firmware update
  • OLED screen with menu
  • Cabinet linking
  • Support for 4 player, either with Capcom IO in 4 player mode, or cabinet linking
  • 4 mounting holes, and shipped with screws and PCB standoffs 🙂

The JVS-PAC is not an ultimarc.com product – and I am not affiliated in any way with ultimarc.com. (I am however a happy customer, and Andy didn’t mind me using the name JVS-PAC)