Firmware Update

Firmware update

The firmware can be updated using a standard Micro SD card. The card must be formatted with a FAT file system.  It is not possible to ‘brick’ or damage the unit during firmware update, if you experience an error – simply try again.

Download zip file below, and extract file to root of sd card.

Update procedure

  • Power off system
  • Insert SD card into JVS Expander
  • Press and hold both A and B button
  • Power on system, MiSTer (not stock DE10 software) needs to run on the DE10 for the Expander to be powered reliably during update.
  • Follow instructions on screen

Instead of powering off/on system, you can also disconnect/reconnect the DC jack on the DE10-nano.

Firmware

Will be published here when available, and generally announced on Twitter if it’s something major/important.

ImageFIxes/Improvements
2024-01-21New USB stack and surrounding code reworked from scratch, update encouraged.
2023-01-19Updated JVS code
Fixes issue with stuck inputs when operating in Gamepad mode

User Interface

You navigate the OLED interface by pressing the A and B buttons.

  • The A button is for ‘Action’, i.e. change an option or execute something
  • The B button moves ot the next screen.

The OLED has a screen-saver that will turn off the display after 5 minutes. Press the B button to wake it up.

JVS communications to your cabinet has to be operational for the user interface to be enabled.

Status Screen (default)

This screen gives you basic status of the running setup:

  • JVS Status and found IO board
  • User Lock is enabled
  • Status of SyncGuard, or HDMI->Monitor if you’re using a flat panel with HDMI directly from the DE10
  • JVS update frequency

Input Test

This screen will show what the JVS IO board is telling the expander, and is a convenient way to troubleshoot either your JVS cabinet or if you suspect something is up with your MiSTer installation. Active inputs will be highlighted in real-time.

SE=service button, C1/C2=coin1 coin2, TS=test button

Video Input

Shows number of lines, horizontal and vertical frequency of the video signal coming from MiSTer. If you use digital video straight from the DE10, this screen say that RGB DAC is disabled.

SyncGuard

This is where you configure SyncGuard to match your monitor. The default is Tri-Sync. Options are:

  • 15kHz/JAMMA
  • 15/25 Auto
  • 25 kHz/EGA
  • 31 kHz/VGA
  • Tri-Sync
  • Off

USB mode

Selects if the Expander operates in MAM Keyboard or 2xGAMEPAD mode.

Keypress (Space).

Only available when in Gamepad mode, press B button to issue the ‘Space’ key to MiSTer.

Keypress (Enter)

Only available when in Gamepad mode, press B button to issue the ‘Enter’ key to MiSTer.

MiSTer menu

Default is ‘All Options’ which lets you control MiSTer volume and settings by using joystick and buttons on your cabinet. If you only want to enable core selection, change it to ‘Core only’.

Save Config

This will save the configuration to internal EEPROM. If you long-press A, configuration will reset to factory default and the Expander will reboot.

Voltages

Displays various voltages:

  • JVS 5V – what the Expander is getting from your cabinet
  • USB VBUS – the voltage supplied to the Expander from the DE10 via the USB OTG cable
  • USB HUB – Voltage supplied to USB devices
  • Int 3.3V – Internal 3.3V supply.

Info

Shows Expander serial number, PCB revision, number of times config EEPROM has been written to and current firmware version.

Hardware Installation

JVS Expander Hardware Installation

Required tools:

  • Torx T10 screwdriver

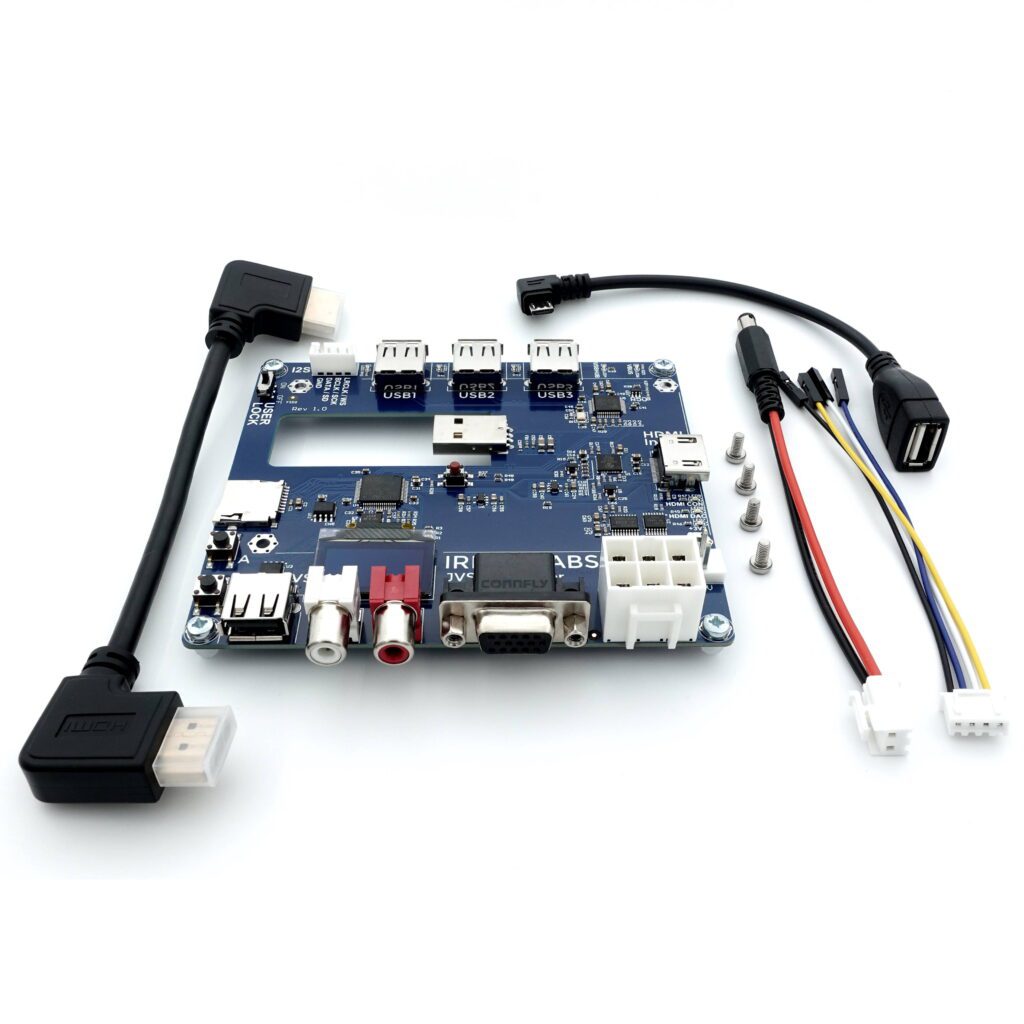
Step 1 – check included parts

  • JVS Expander PCB
  • JST-VH to DC cable
  • USB OTG cable
  • HDMI cable
  • 4 x M3 6mm screws
  • JST-XH to Header cable – for HDMI installations only

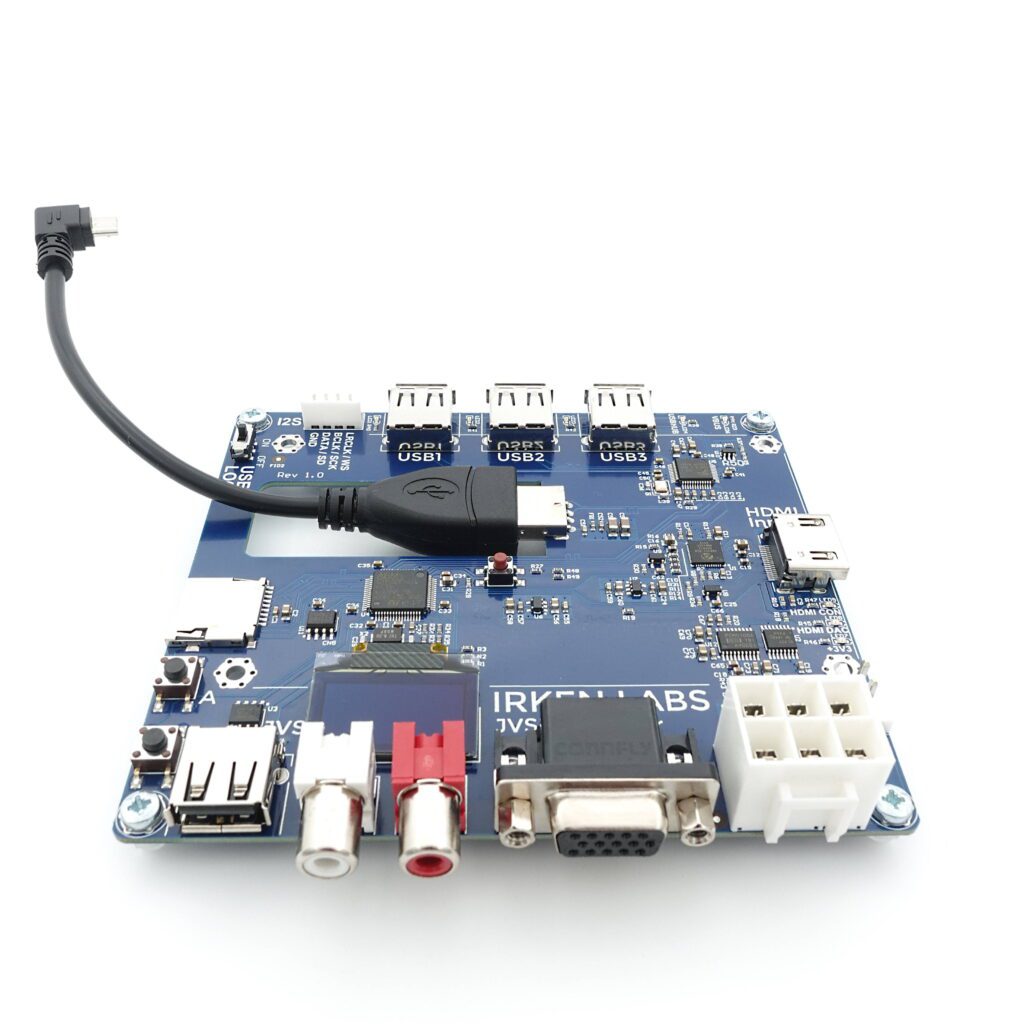
Step 2- Attach USB OTG cable

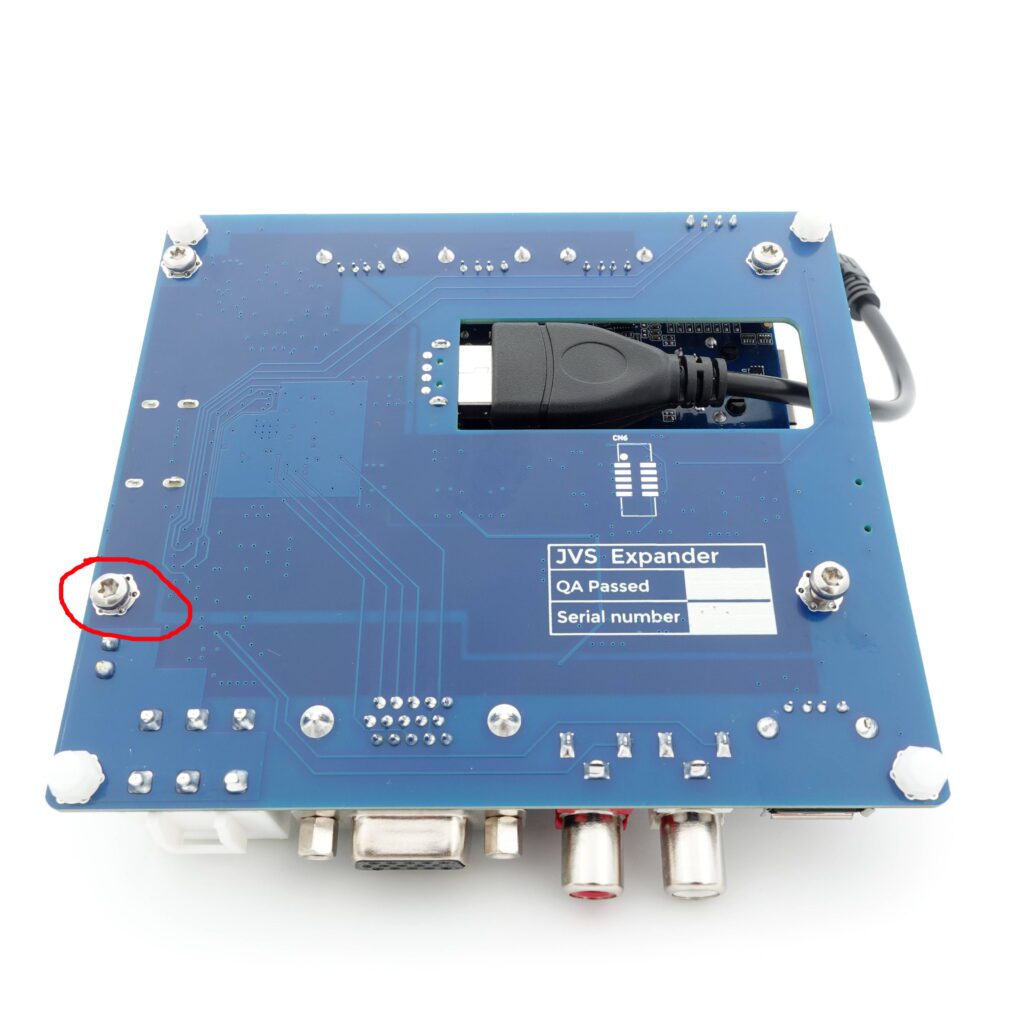
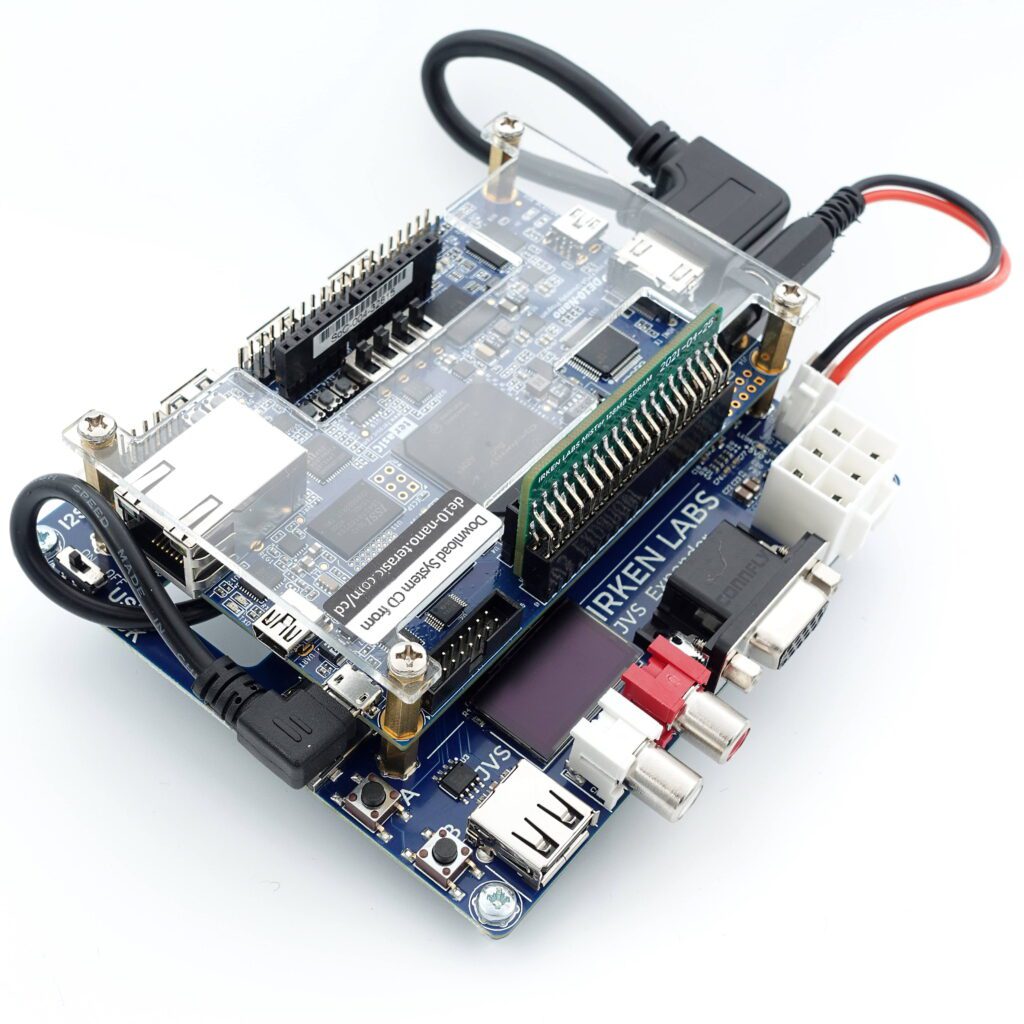
Step 3 – Mount DE10 – 4 screws

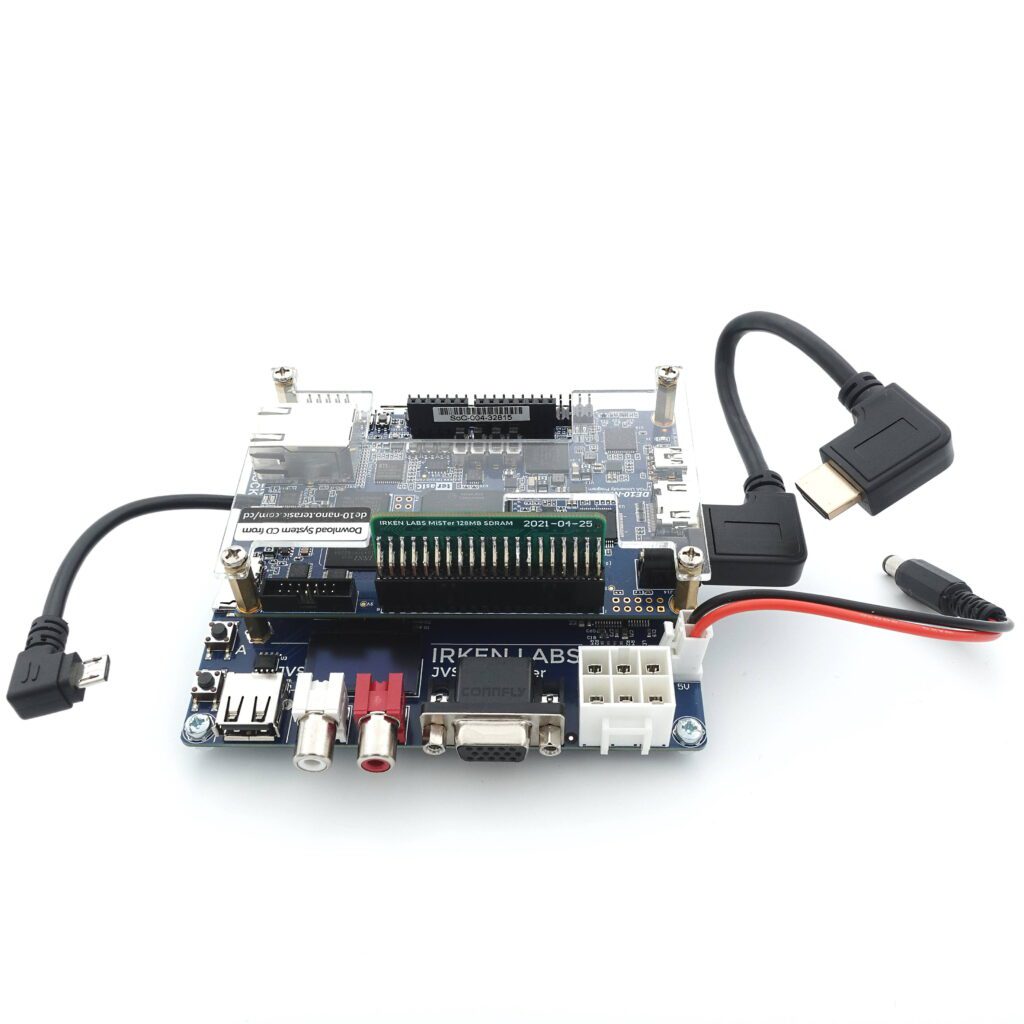
Step 4- Attach HDMI and DC cables

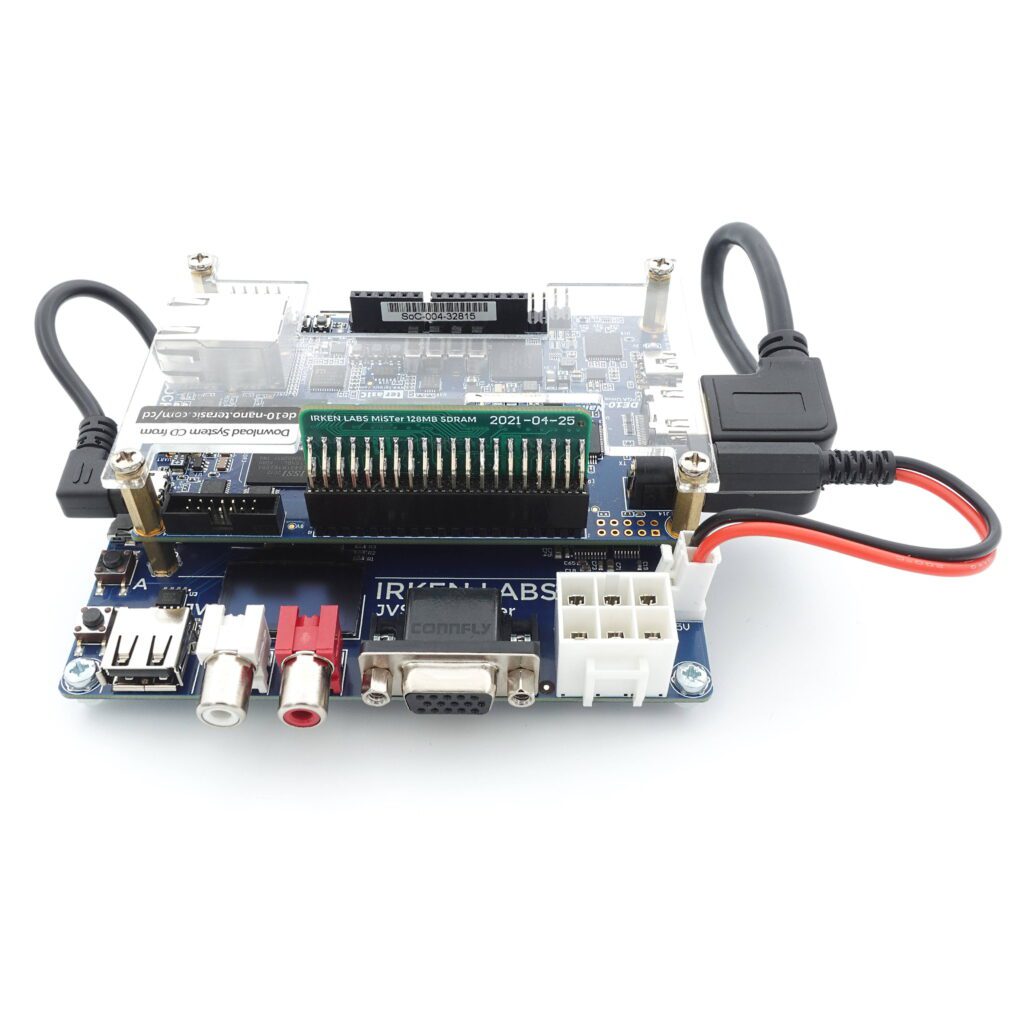
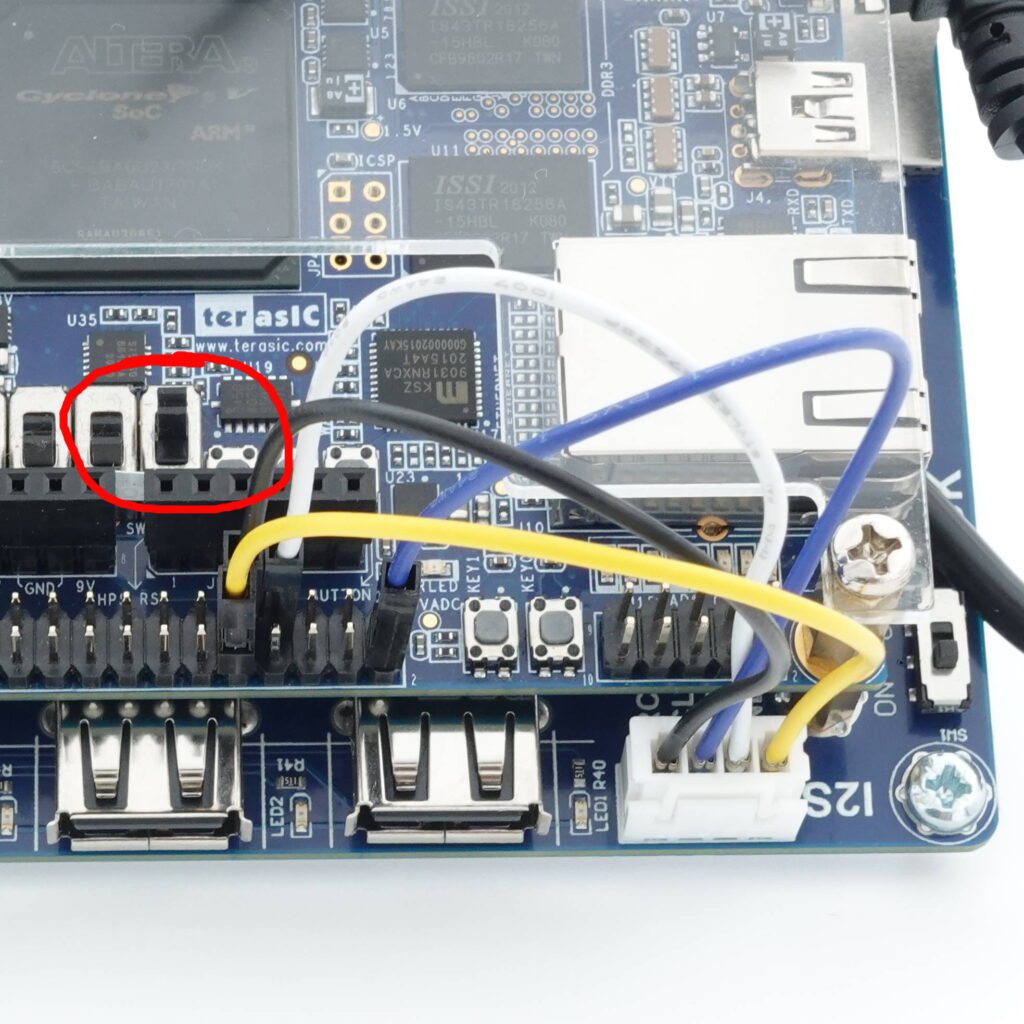
Step 5 – Connect cables to DE10

Step 6 – I2S Audio when using an HDMI monitor

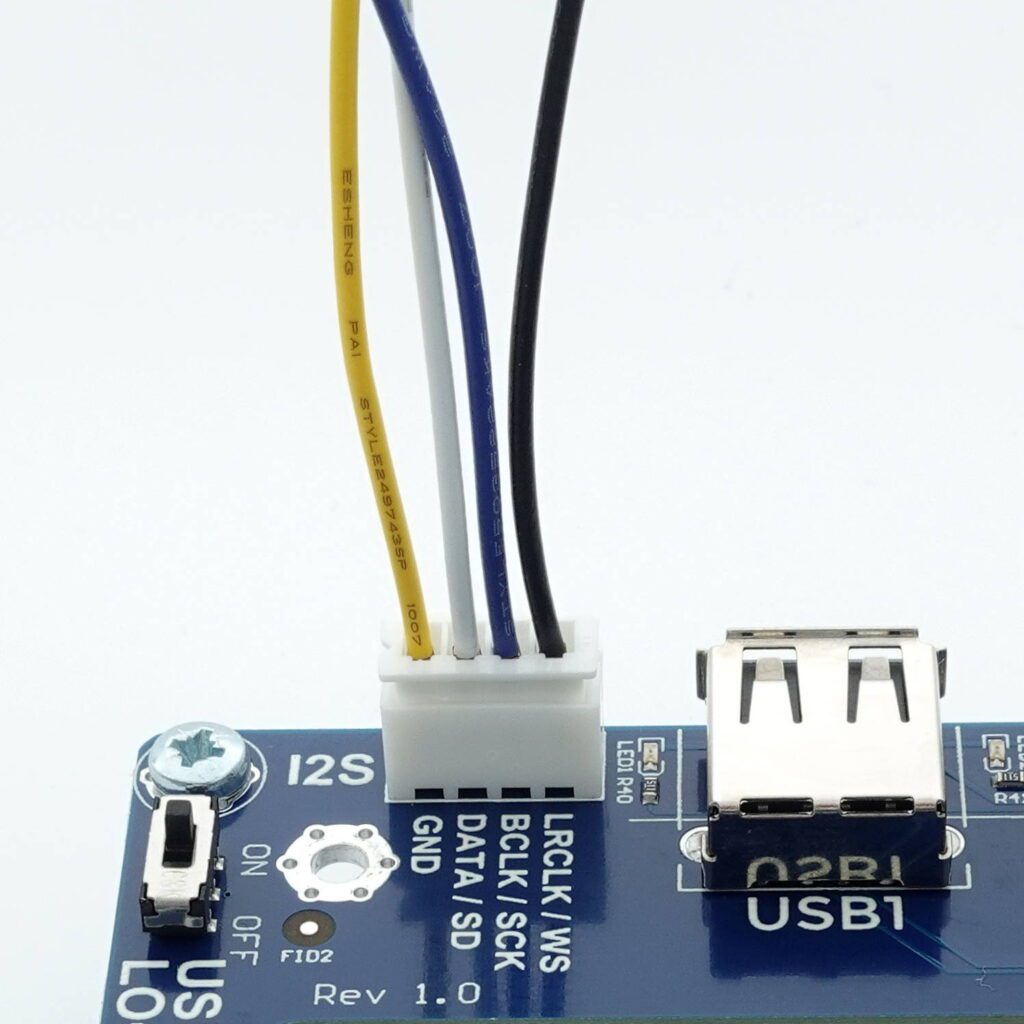
I2S SignalExpander JST-XH PinDE10-nano GPIO pin
LRCLK / WS1 / Black9
BCLK / SCK2 / Blue2
DATA / SD3/ White7
GND4/Yellow10
Toggle switch to enable I2S!

What is the JVS Expander?

What is the JVS Expander?

The JVS Expander has the missing connectors and electronics to turn your DE10-Nano into a self-contained JVS system. You can purchase it by selecting “Store” then “Products” from the menu.

Features:

  • 24 bit (16.7 million colors) RGB DAC
  • JVS Interface
  • Sync-Guard – will block frequencies your monitor is not designed for
  • I2S audio DAC with RCA stereo output
  • Low-lag, works as either keyboard with MAME layout or 2xGamepad
  • Easy firmware update

Caveat / Disclaimer

The JVS Expander is tailored to work with the DE10-Nano and the current release of the MiSTer project (as of 2022-11-28). HOWEVER, the MiSTer project is very much a moving target and the maintainer/architect has stated directly that playing arcade cores in real arcade cabinets is not a priority. Future MiSTer developments may result in MiSTer being useless in an actual arcade cabinet – but hopefully not :).

I have tried my best to provide clear instructions on how to get the Expander working with the MiSTer project, but neither this site nor me personally will ever be an authority on the inner workings of the MiSTer project. If you have an issue you believe is rooted in the JAMMA Expander, don’t hesitate to reach out – but I may not be able to be of great assistance with current or future MiSTer quirks that are not related to the JAMMA Expander.