User interface
You navigate the OLED interface by pressing the B button to advance to next screen. A button will change an option or execute a command.
The OLED has a screen-saver that will turn off the display after 5 minutes. Press the B button to wake it up.
Status Screen (default)
This screen will show if USER-LOCK switch is enabled, if SyncGuard is OK or blocking, and the JAMMA voltages for 5v and 12V.
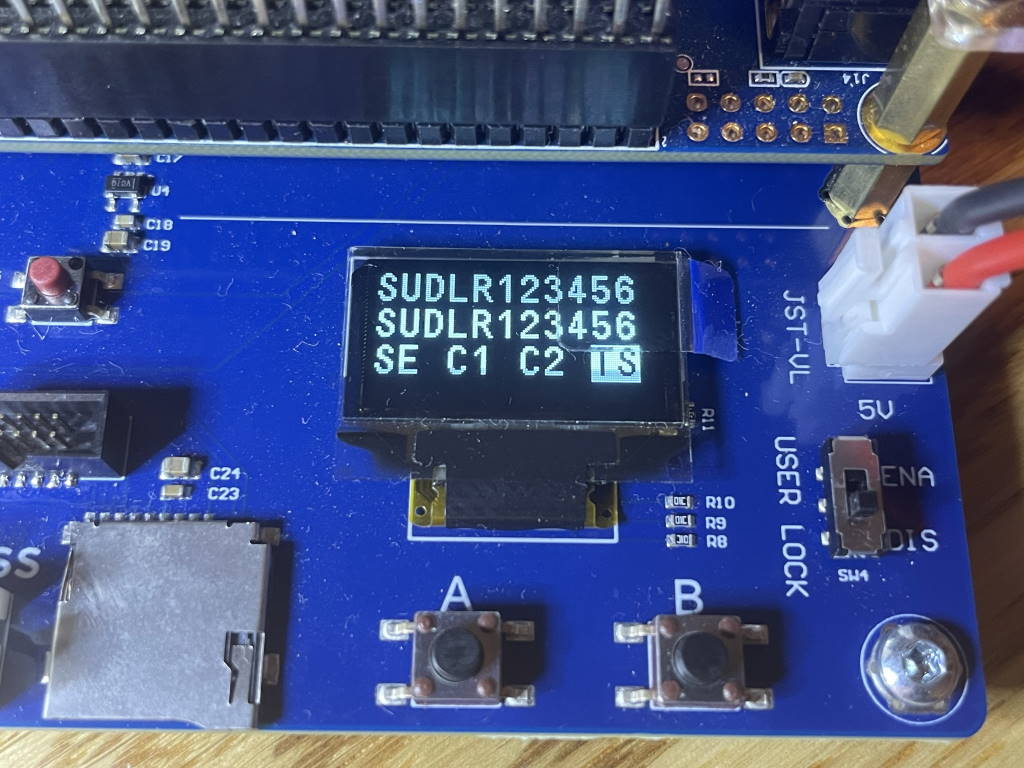
Input Test
This screen will show the status of your JAMMA edge, and is a convenient way to troubleshoot either your JAMMA cabinet or if you suspect something is up with your MiSTer installation. Active inputs will be highlighted in real-time.
SE=service button, C1/C2=coin1 coin2, TS=test button
Video Input
Shows number of lines, horizontal and vertical frequency of the video signal coming from MiSTer.
SyncGuard
This is where you configure SyncGuard to match your monitor. The default is 15kHz/JAMMA. Options are:
- 15kHz/JAMMA
- 15/25 Auto
- 25 kHz/EGA
- 31 kHz/VGA
- Tri-Sync
- Off
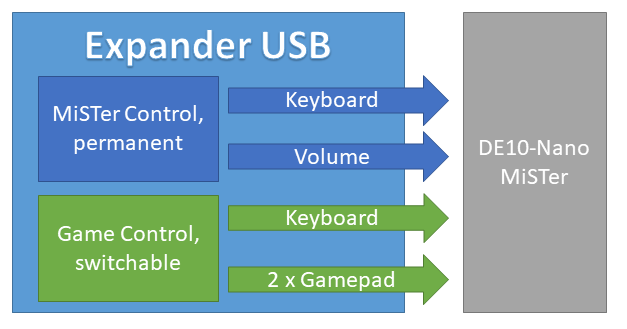
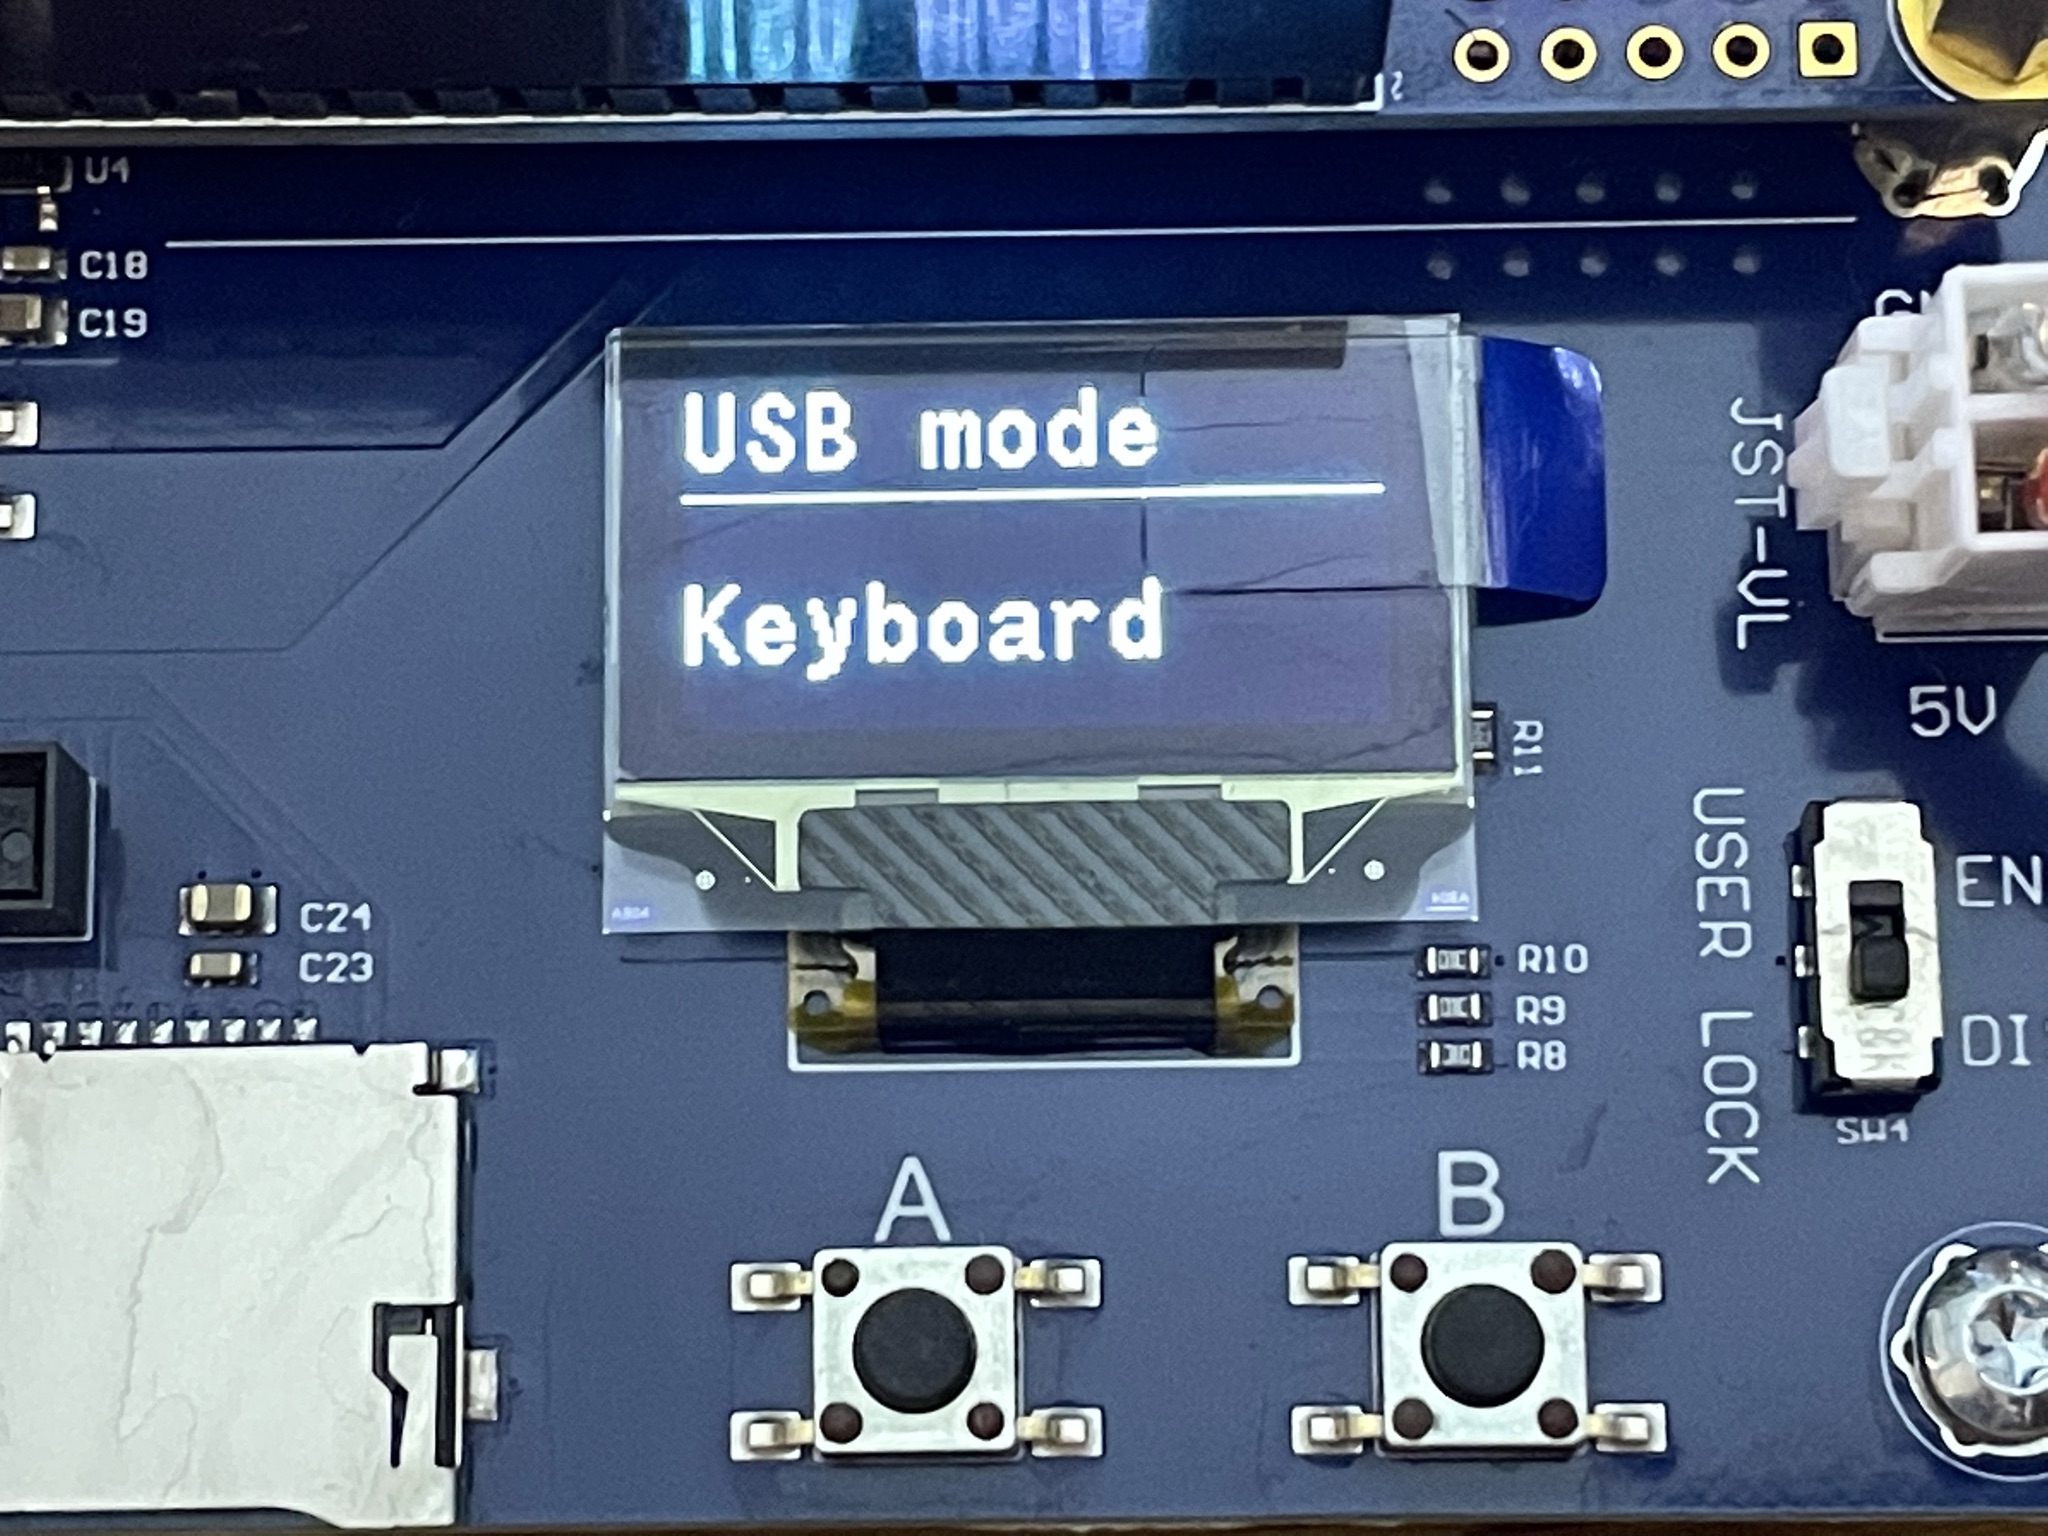
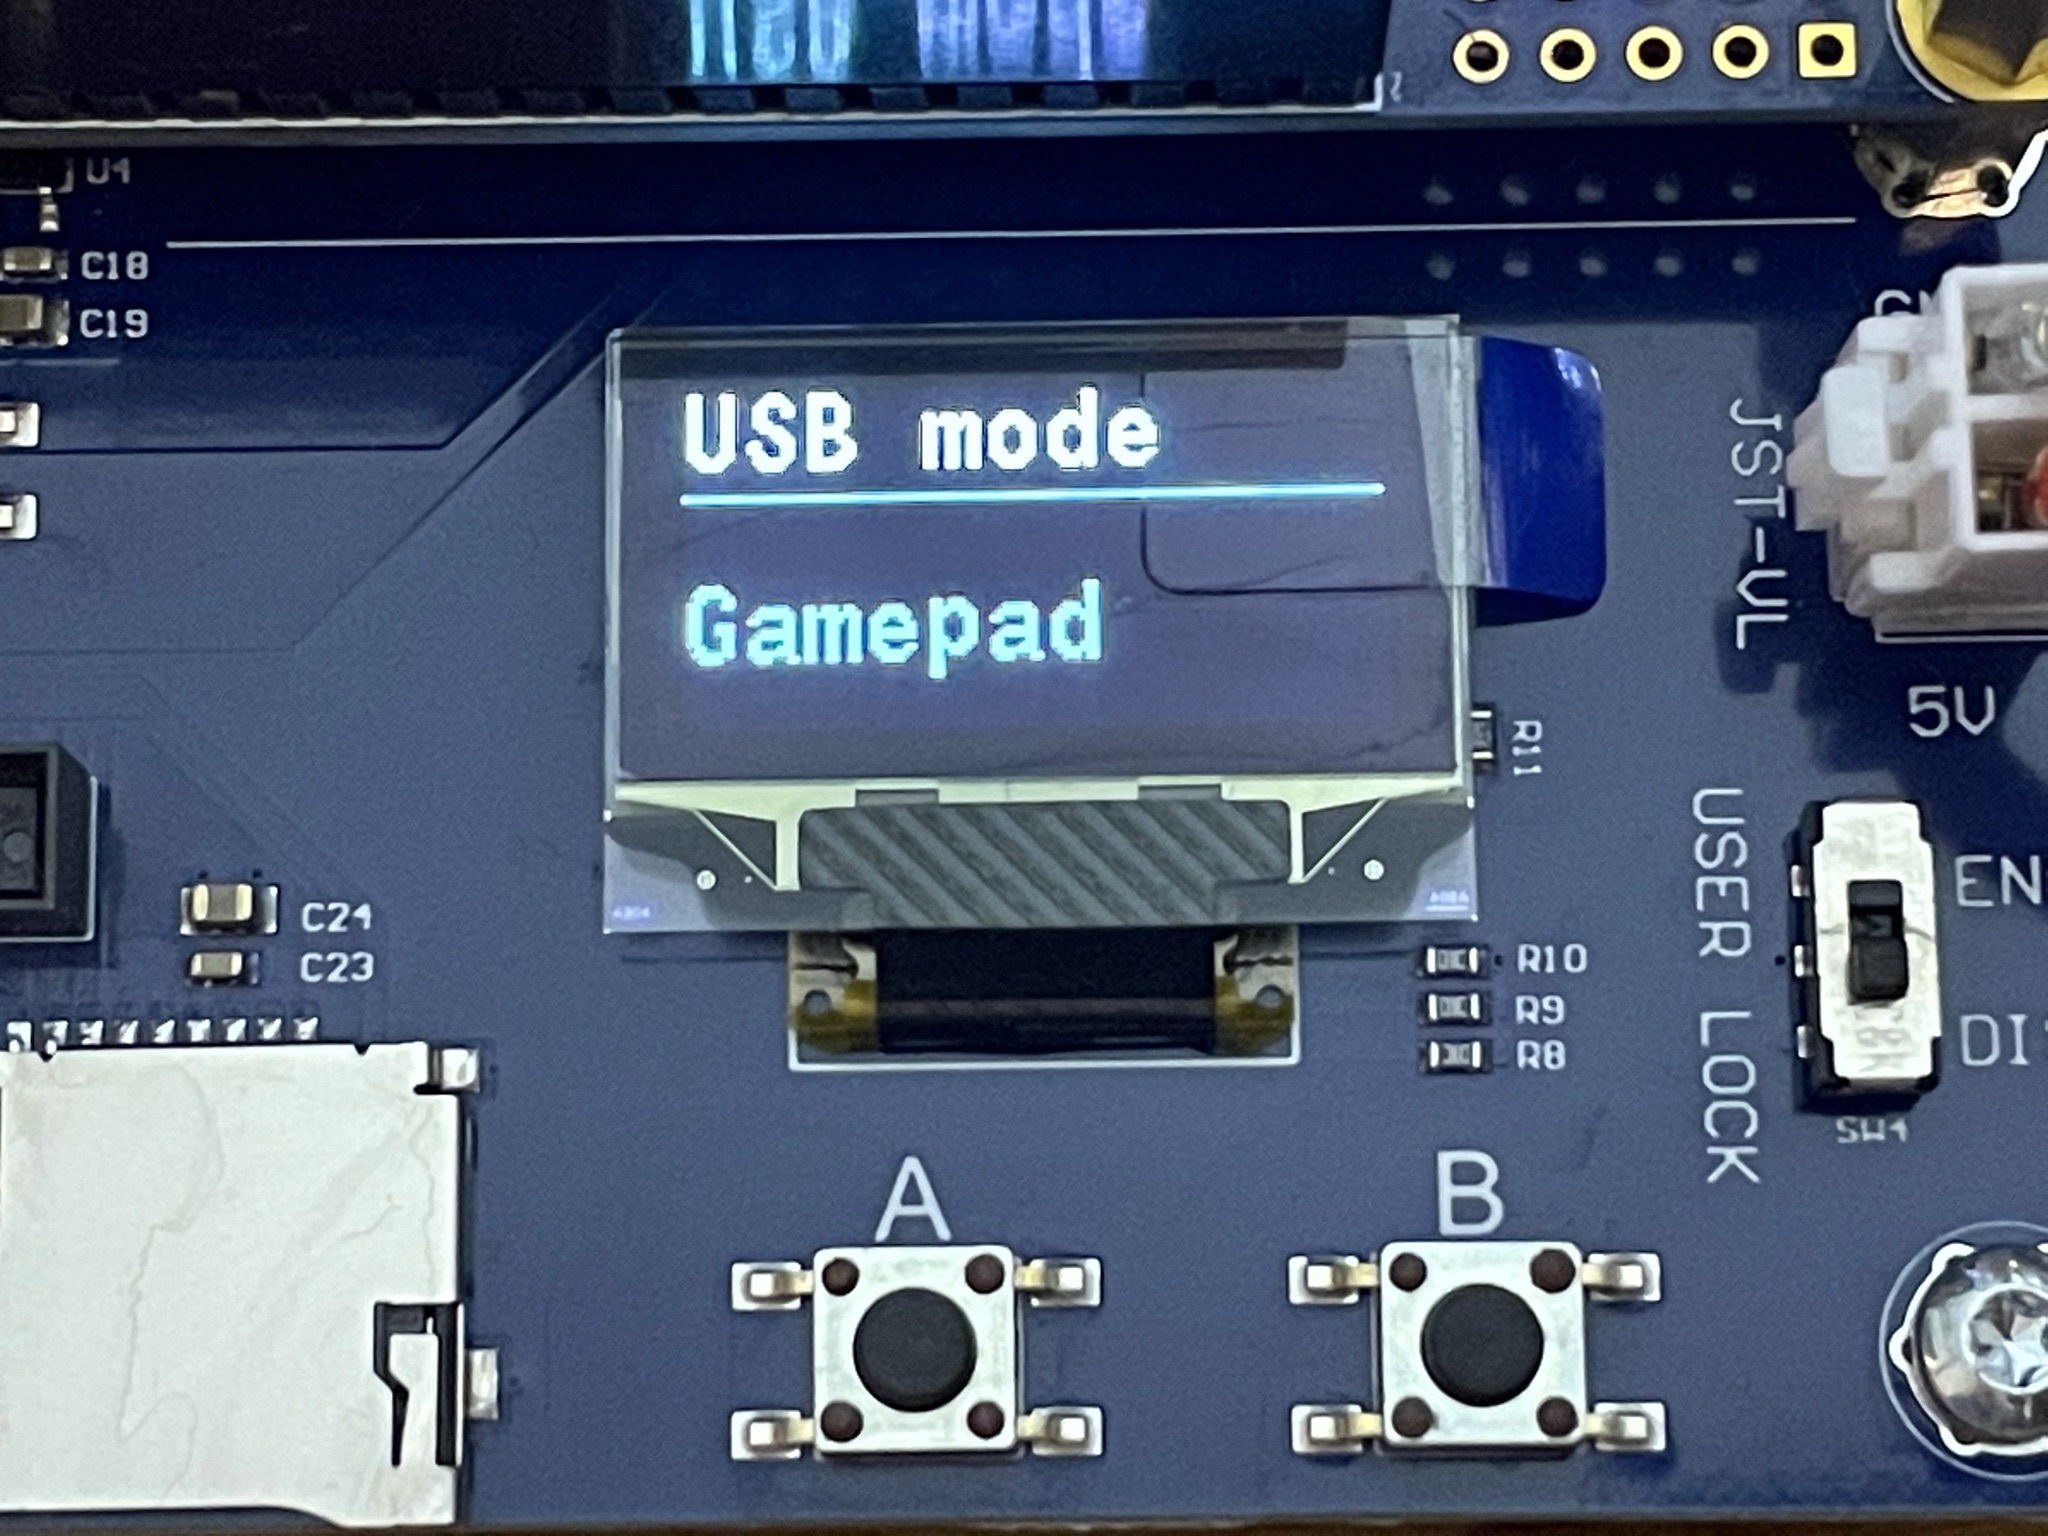
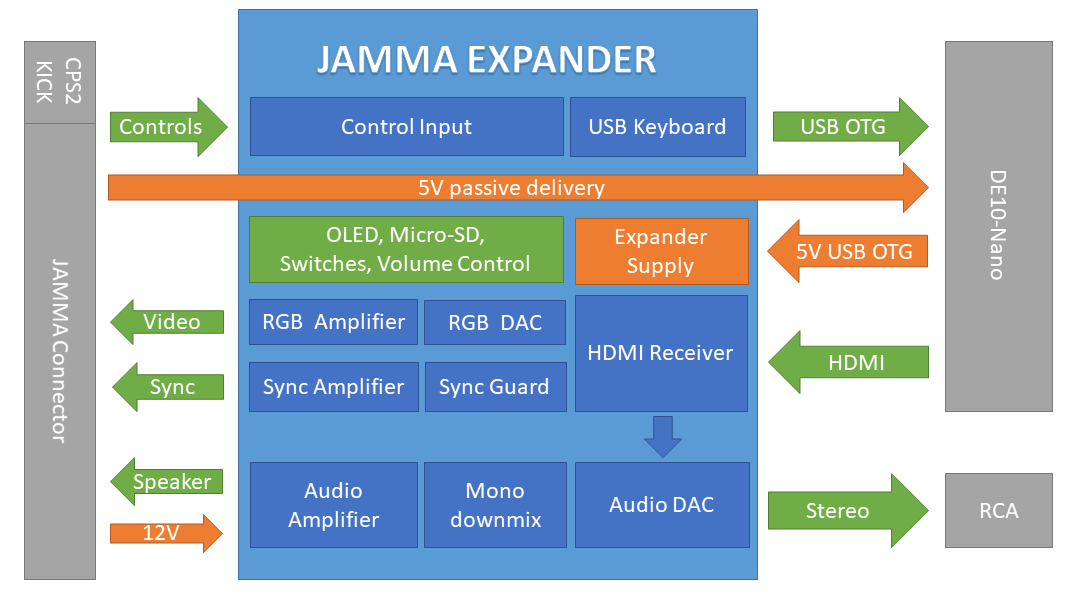
USB mode
Selects if the Expander operates in MAM Keyboard or 2xGAMEPAD mode.
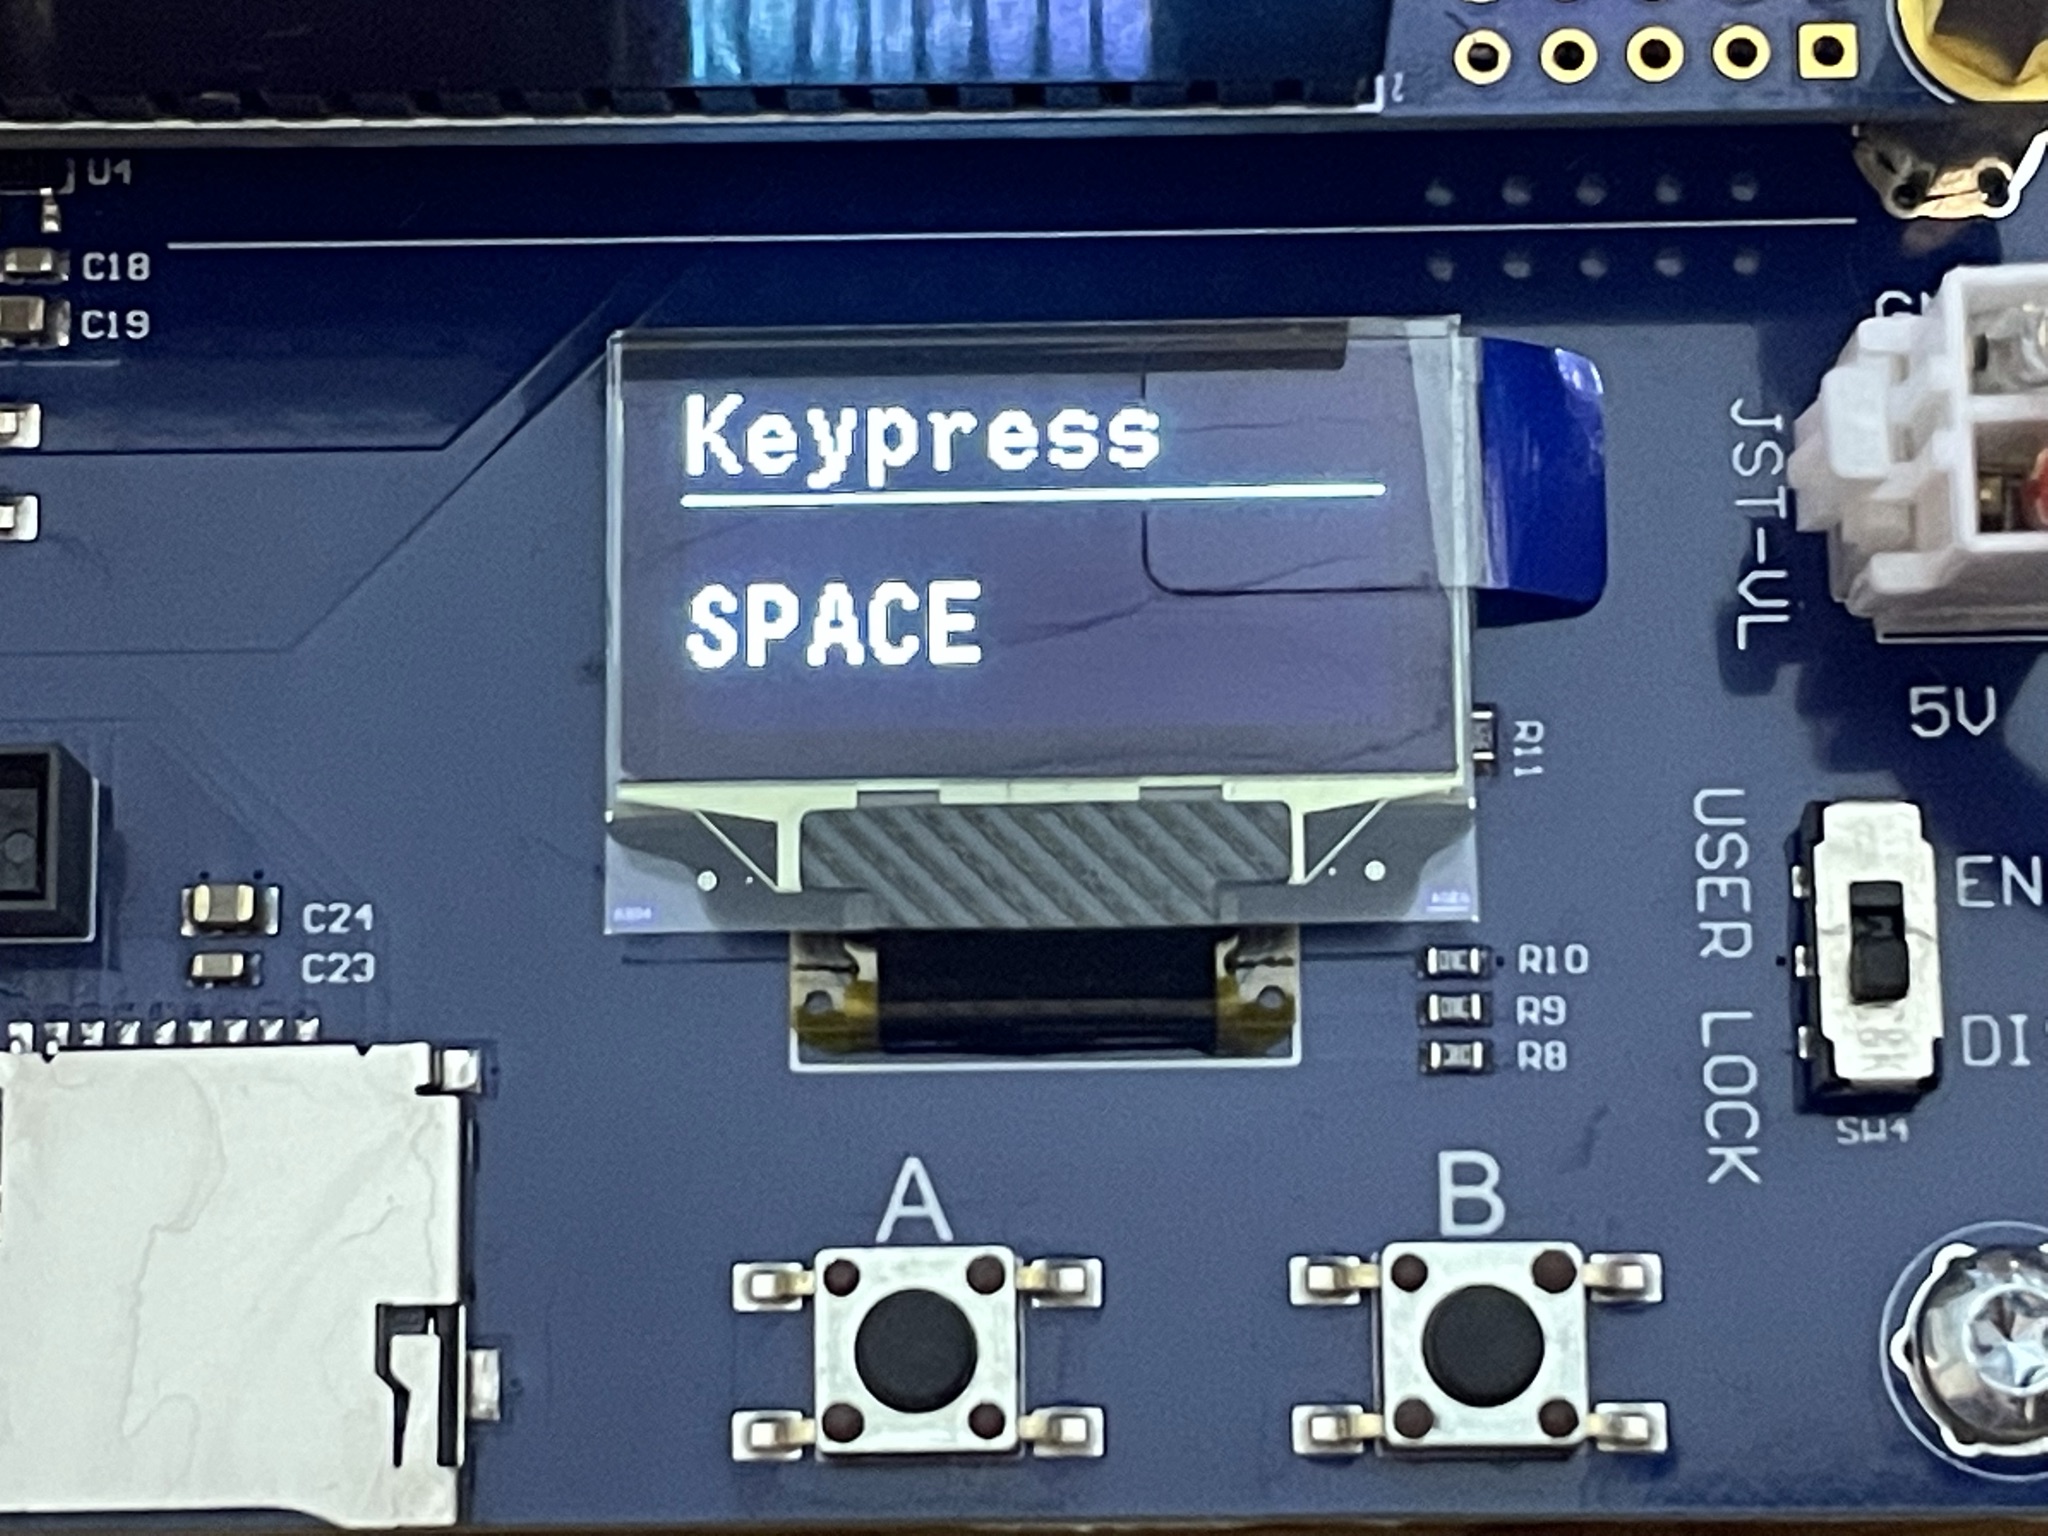
Keypress (Space).
Only available when in Gamepad mode, press B button to issue the ‘Space’ key to MiSTer.
Keypress (Enter)
Only available when in Gamepad mode, press B button to issue the ‘Enter’ key to MiSTer.
MiSTer menu
Default is ‘All Options’ which lets you control MiSTer volume and settings by using joystick and buttons on your cabinet. If you only want to enable core selection, change it to ‘Core only’.
Save Config
You need a micro sd card inserted to save your settings.
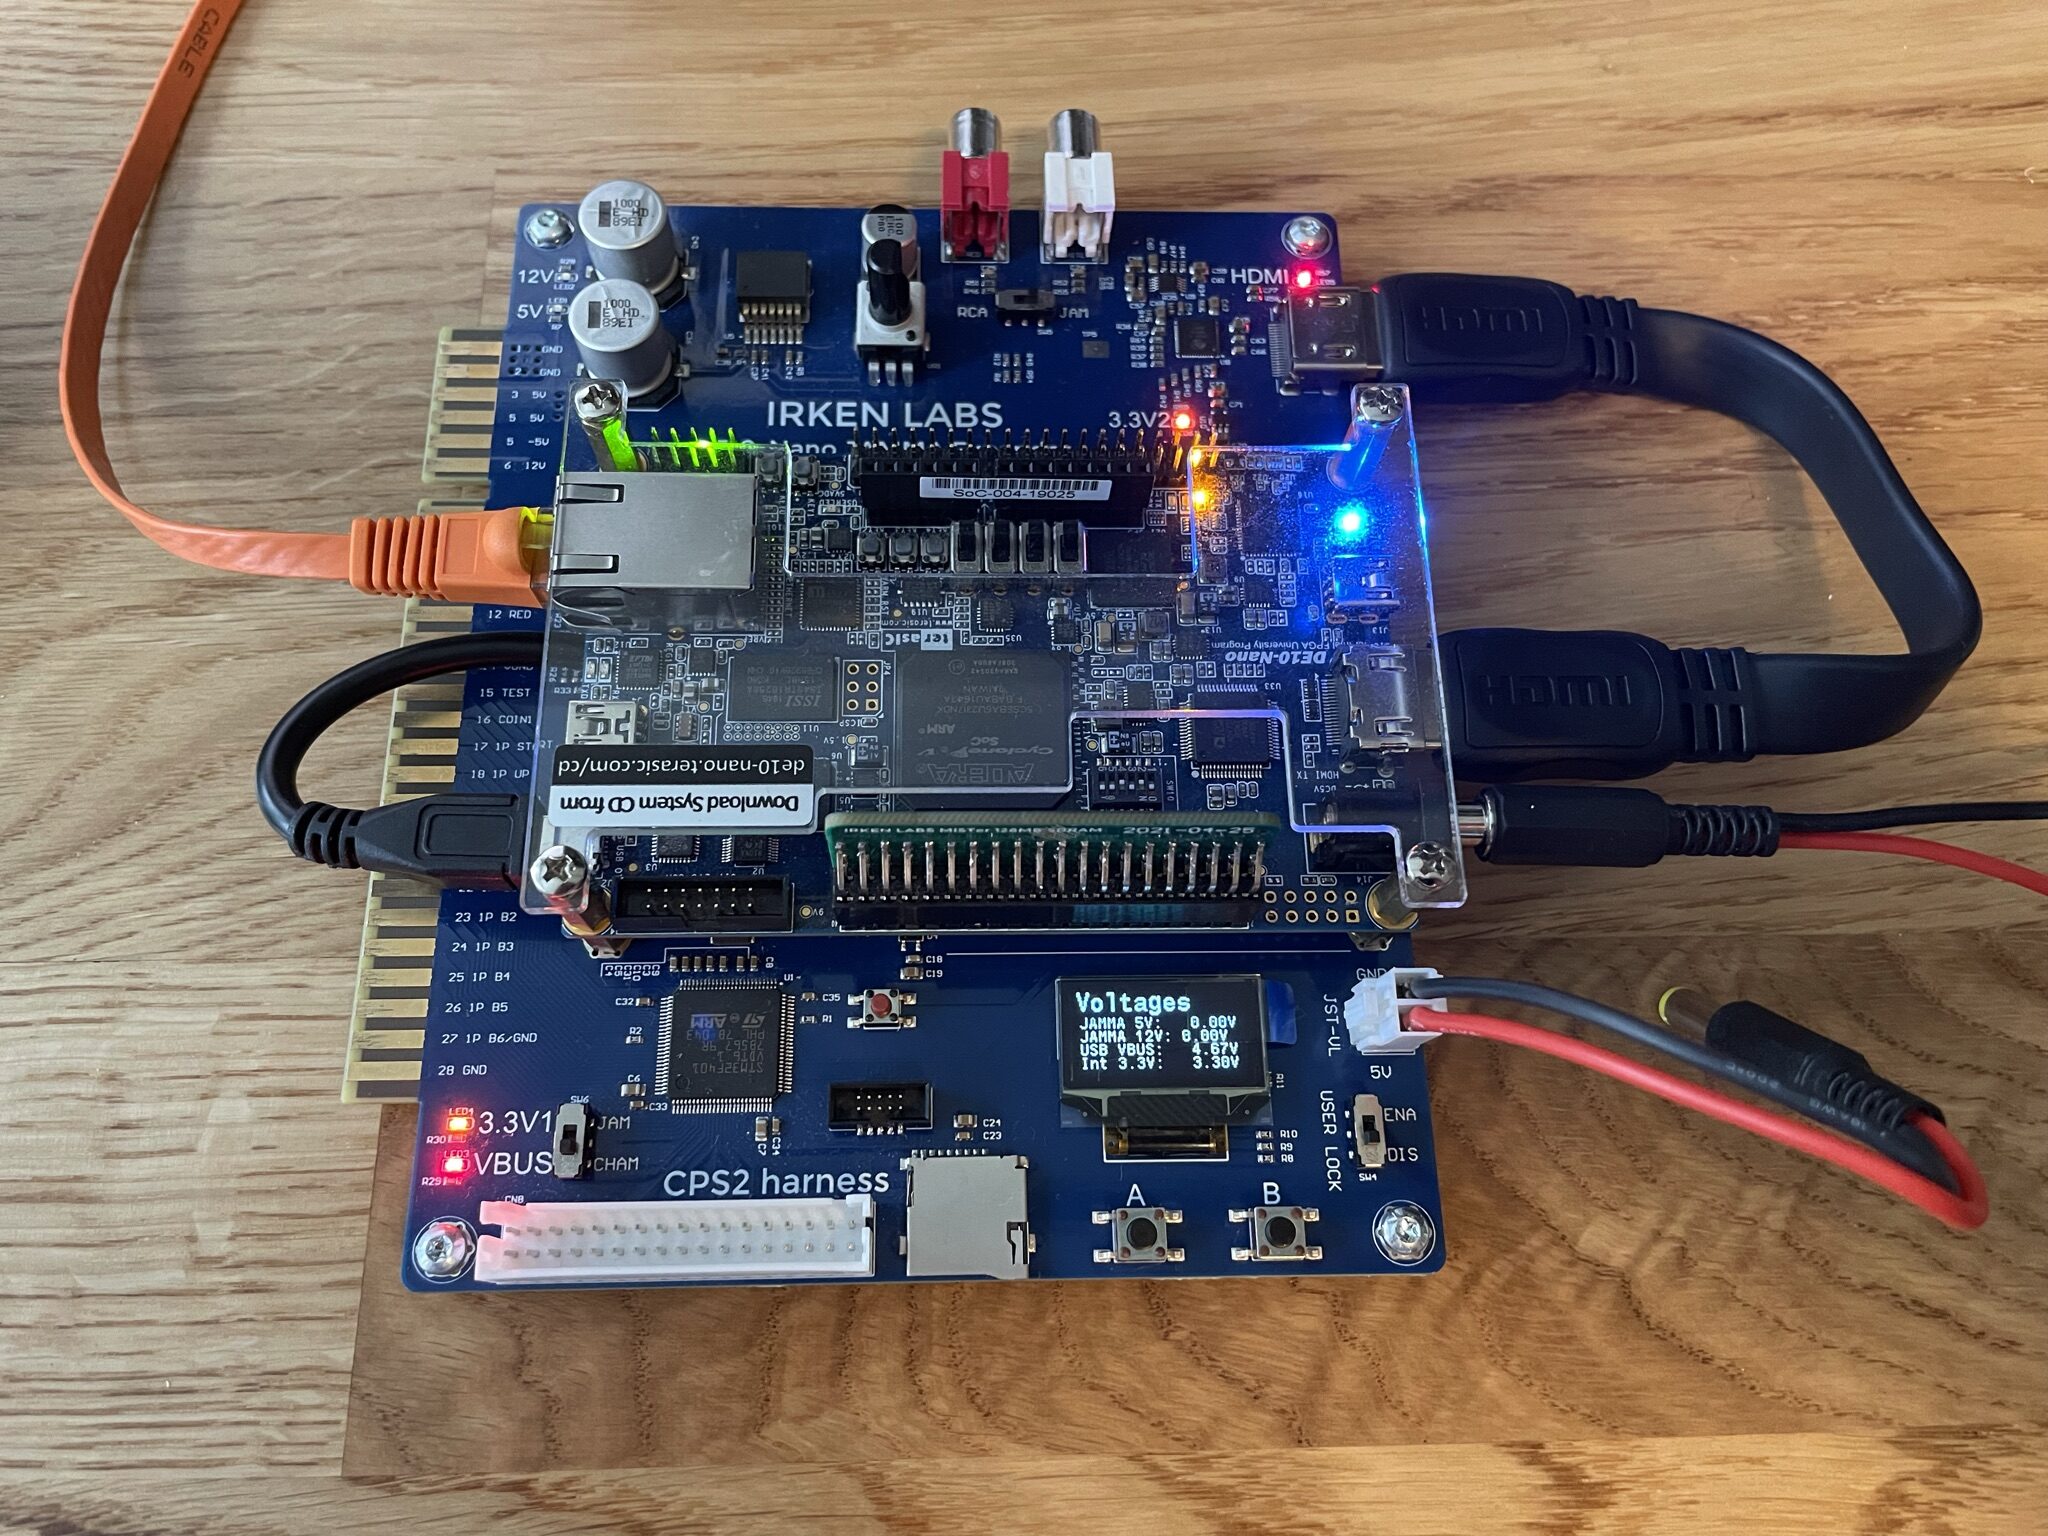
Voltages
Displays various voltages:
- JAMMA 5V
- JAMMA 12V
- USB VBUS – the voltage supplied to the Expander from the DE10 via the USB OTG cable
- Int 3.3V – Internal 3.3V supply.
Info
Shows Expander serial number, PCB revision and current firmware version.