
JVS Expander Hardware Installation
Required tools:
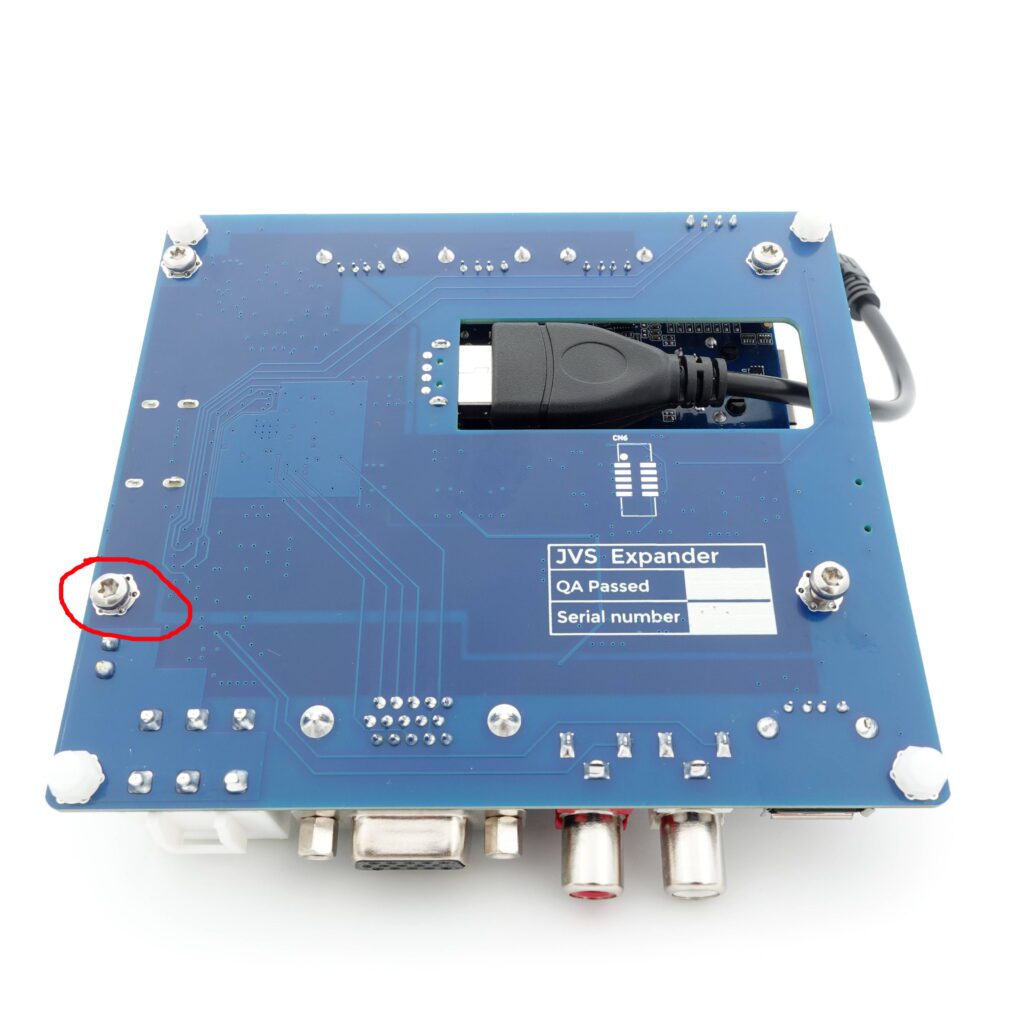
- Torx T10 screwdriver
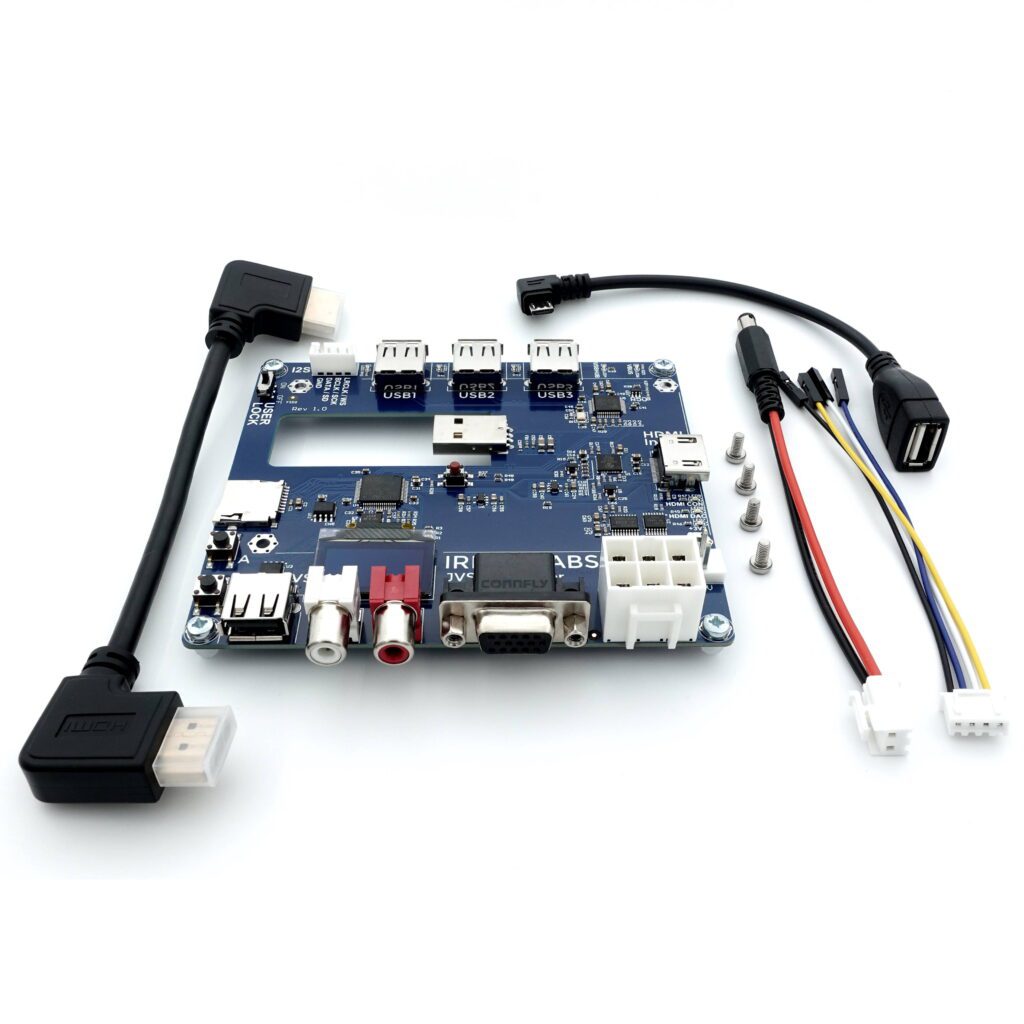
Step 1 – check included parts
- JVS Expander PCB
- JST-VH to DC cable
- USB OTG cable
- HDMI cable
- 4 x M3 6mm screws
- JST-XH to Header cable – for HDMI installations only
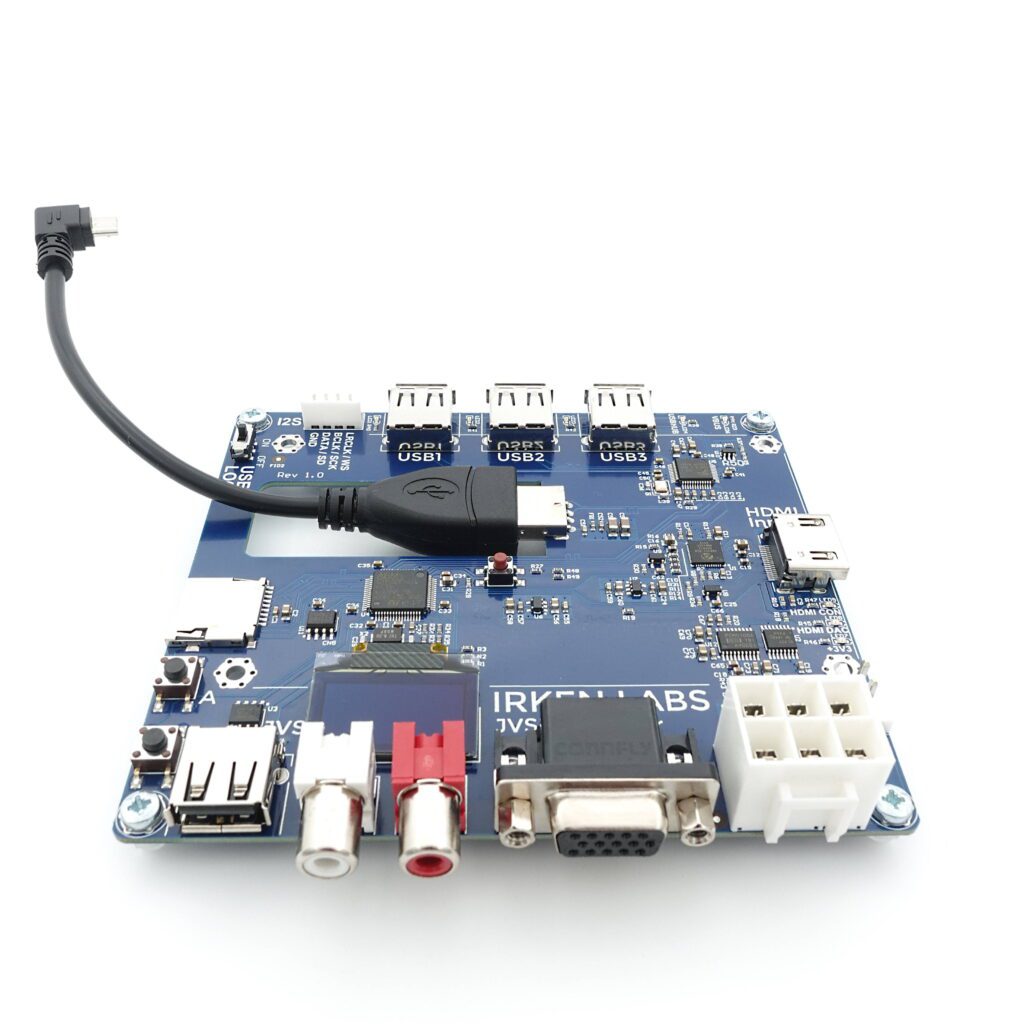
Step 2- Attach USB OTG cable
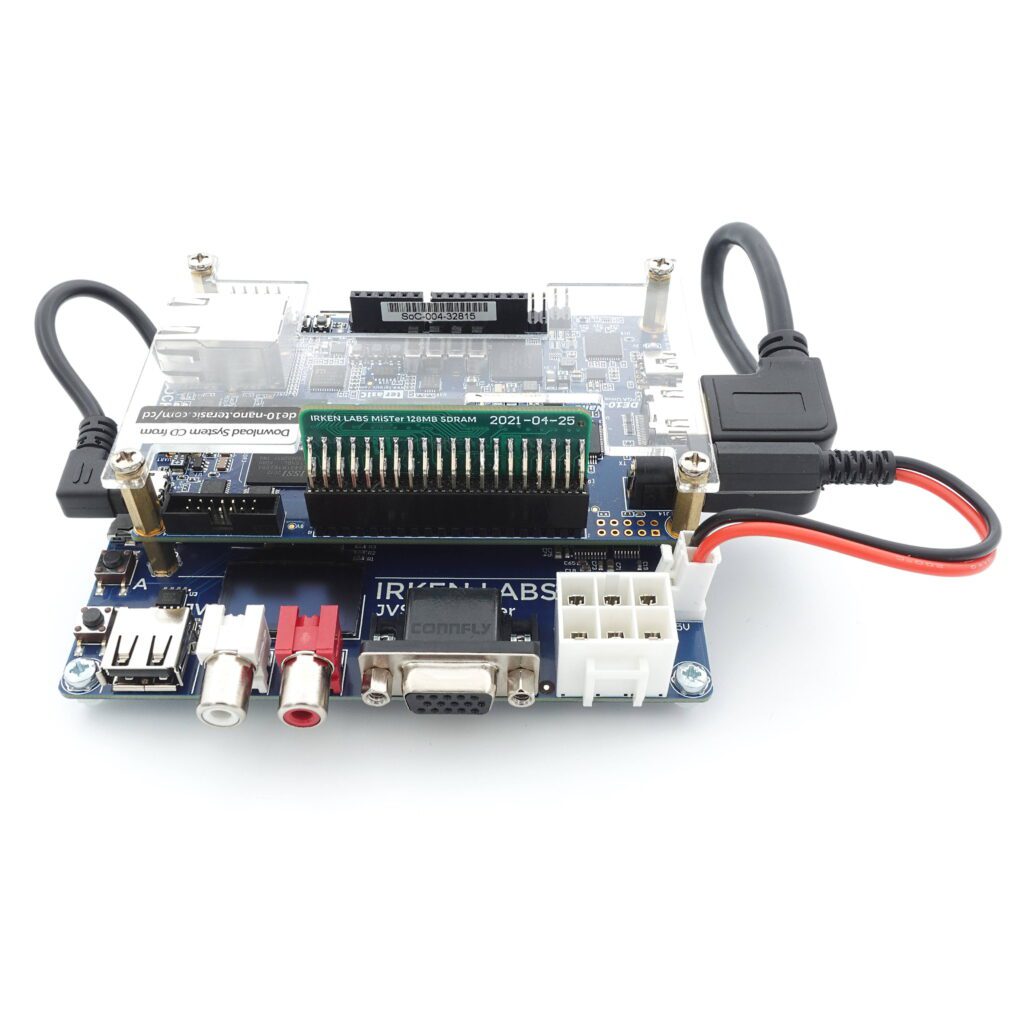
Step 3 – Mount DE10 – 4 screws
Step 4- Attach HDMI and DC cables
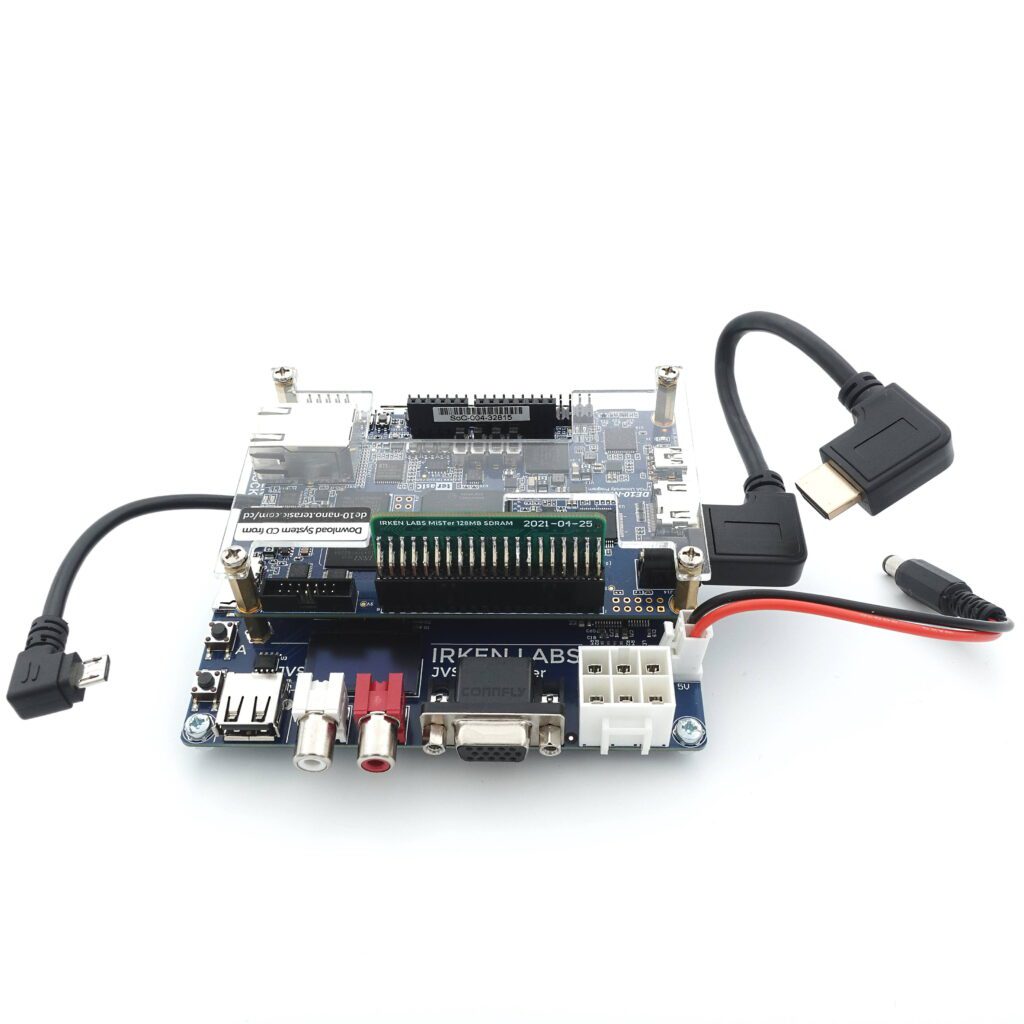
Step 5 – Connect cables to DE10
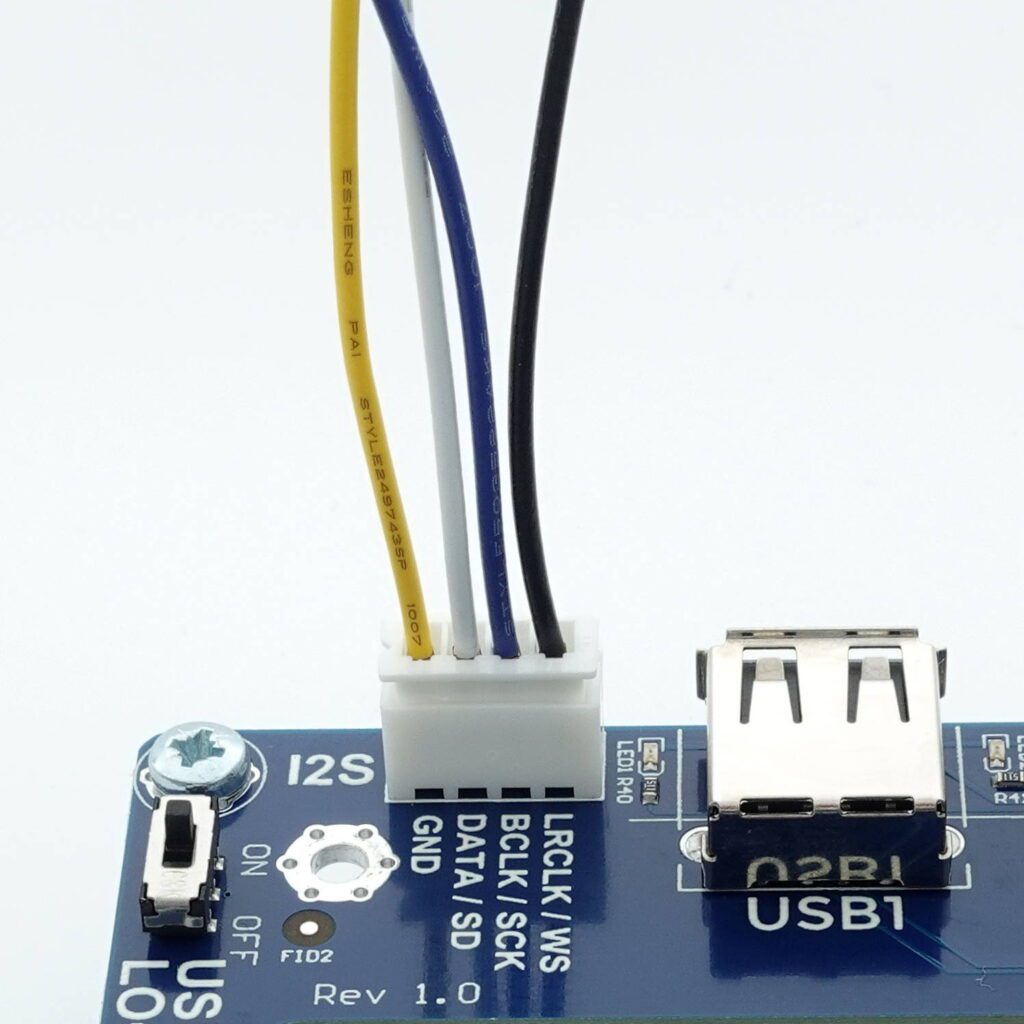
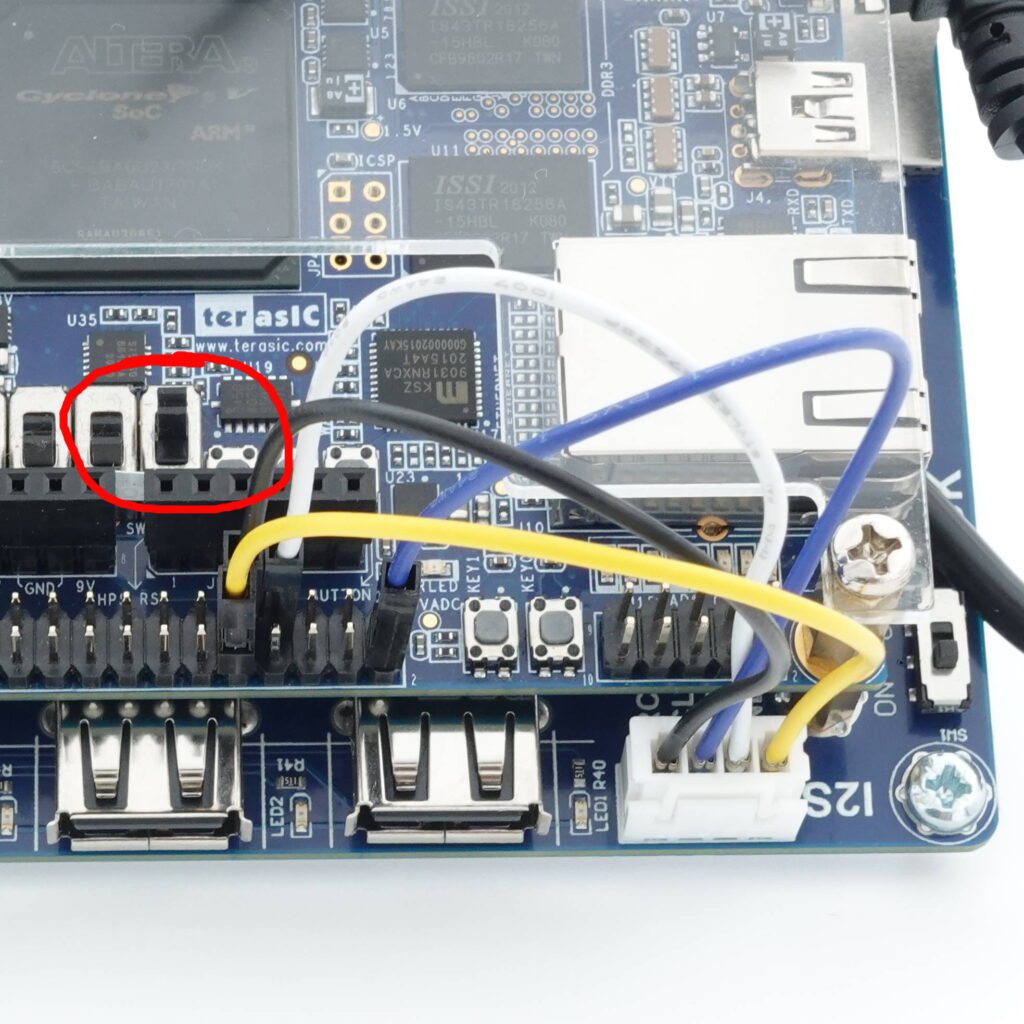
Step 6 – I2S Audio when using an HDMI monitor
| I2S Signal | Expander JST-XH Pin | DE10-nano GPIO pin |
| LRCLK / WS | 1 / Black | 9 |
| BCLK / SCK | 2 / Blue | 2 |
| DATA / SD | 3/ White | 7 |
| GND | 4/Yellow | 10 |
Last Updated on 2022-12-19 by admin